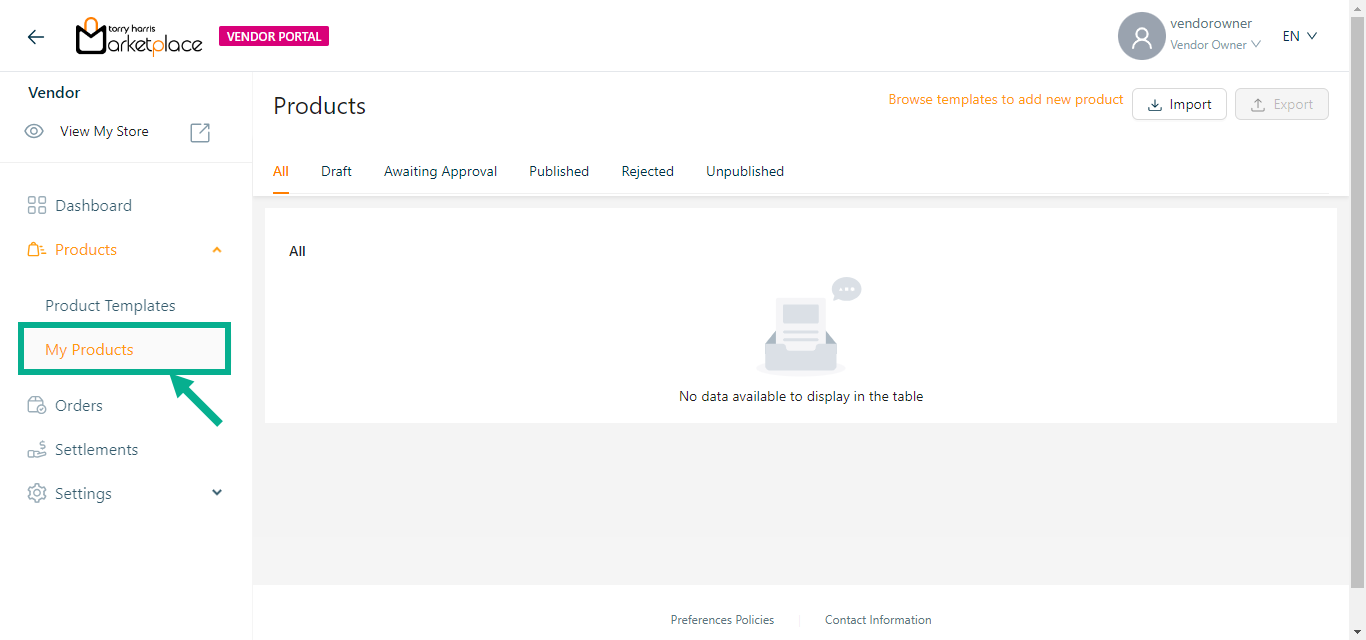
My Products
A product is a tangible or intangible item that is created and offered for sale to customers or clients.
Only the published items are available for sale on the defined storefront.
Before entering the data in the various fields, please review the Field Validation section that is associated with the last sheet.
“Bundle products are not allowed to be added as a bundle item to create another bundled product.”
To create a product, use the Browse templates to add new product button and navigate to the Active tab of the product templates module.
Products are created based on the number of variant attributes that are chosen.
Editing a Product
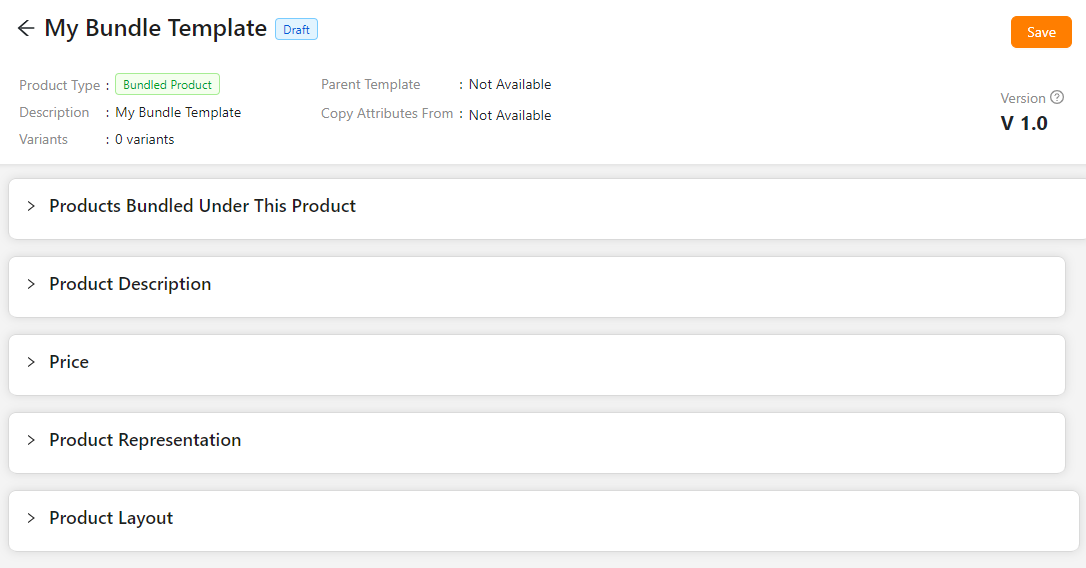
Editing the Bundle Product
Use the search function to filter certain product.
- Click the Edit icon.

The screen appear as shown below.
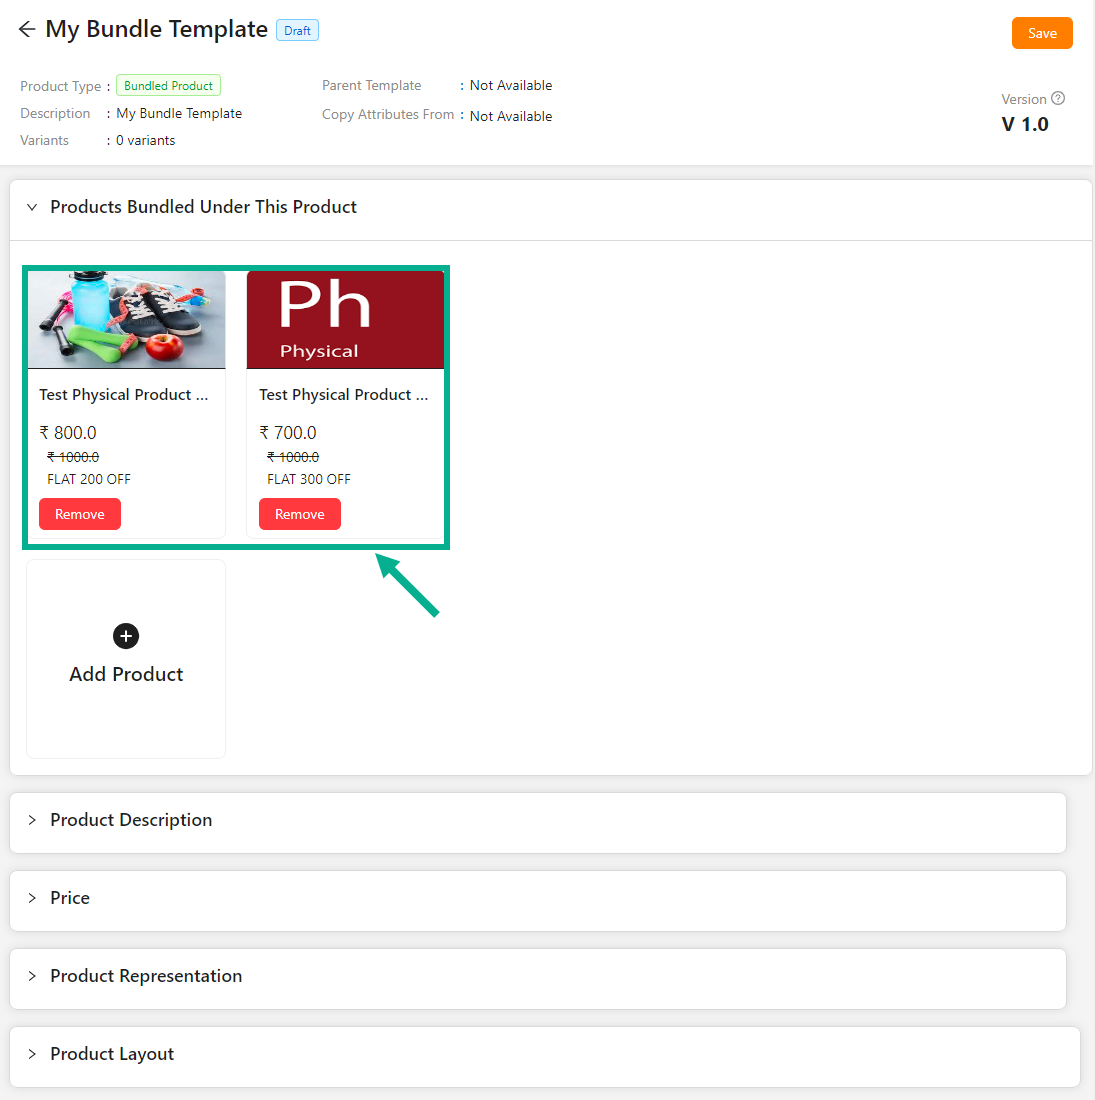
- Click on Products Bundled Under This Product dropdown.
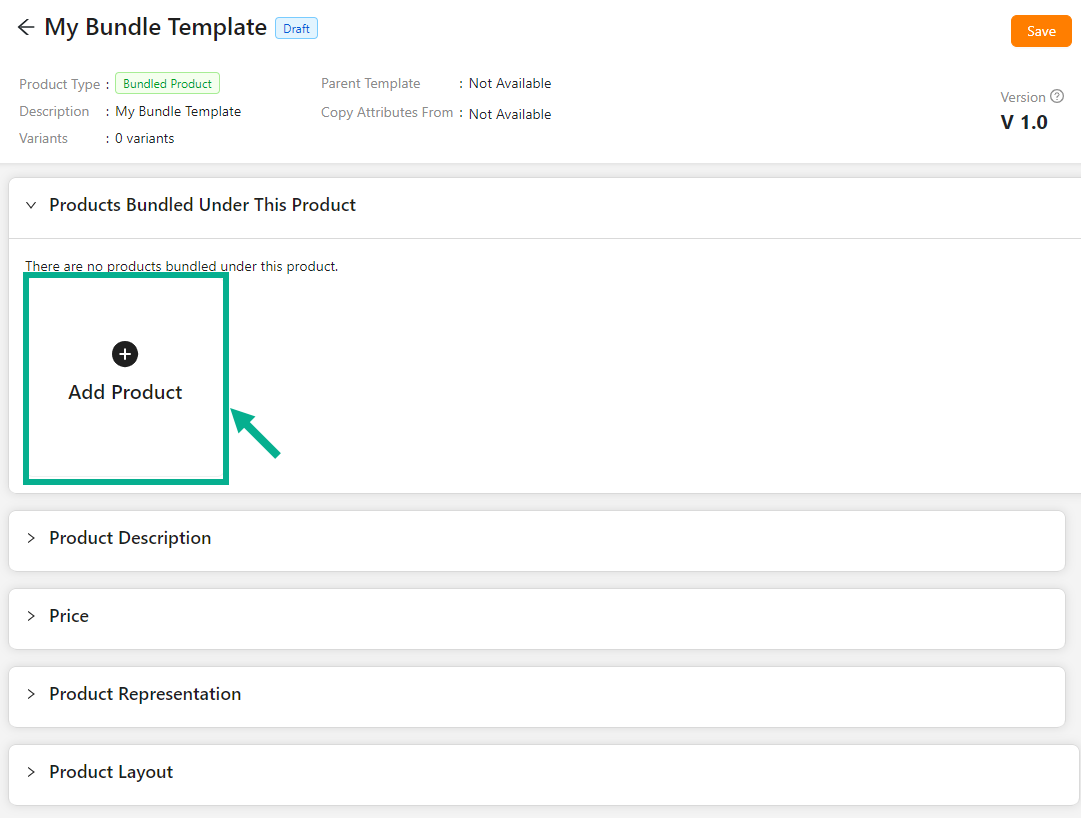
- Click Add Product.
The dialogue box appears as shown below.
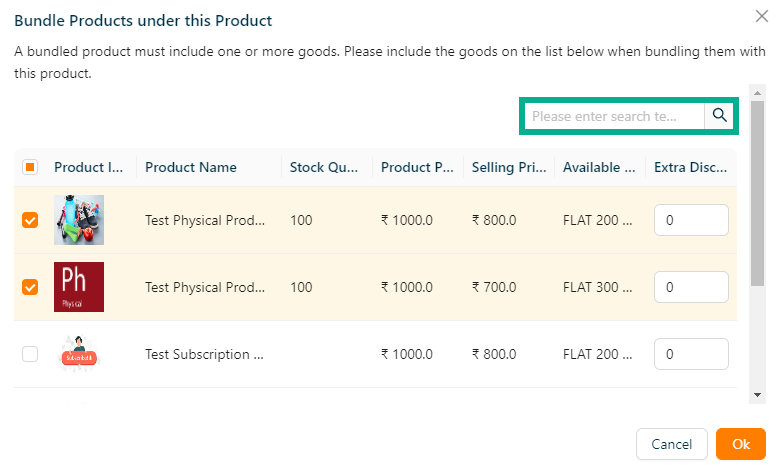
- Select the products from the list that should be bundled.
A bundled product must contain two or more items. Include the items in the list below to bundle them immediately, or change them on the product page while modifying the product details.
Use the search function to filter certain product.
- Click Ok.
The products added to the bundle and appears as shown below.
Enter the Short Description.
Enter the Product Name.
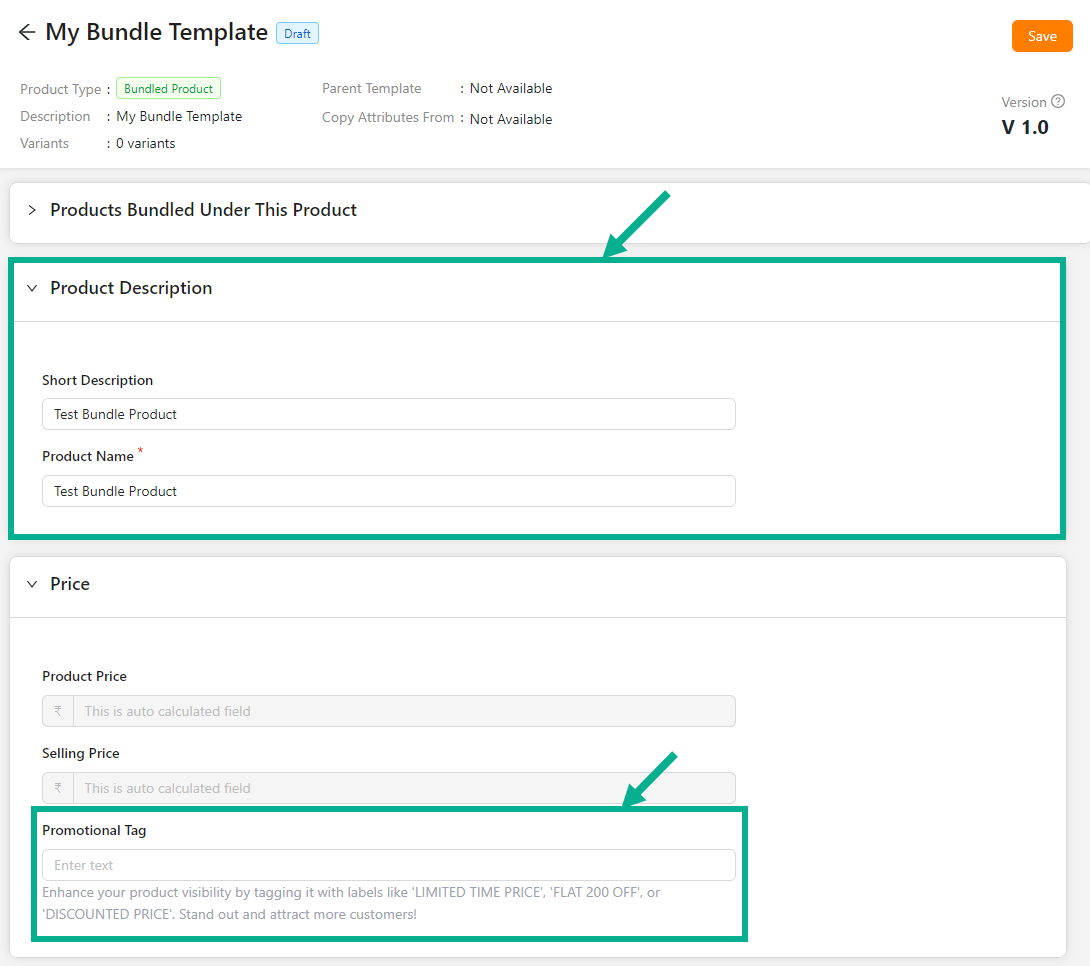
- Enter the Promotional Tag.
Based on the products added to the bundle, the Selling Price and Product Price are automatically calculated.
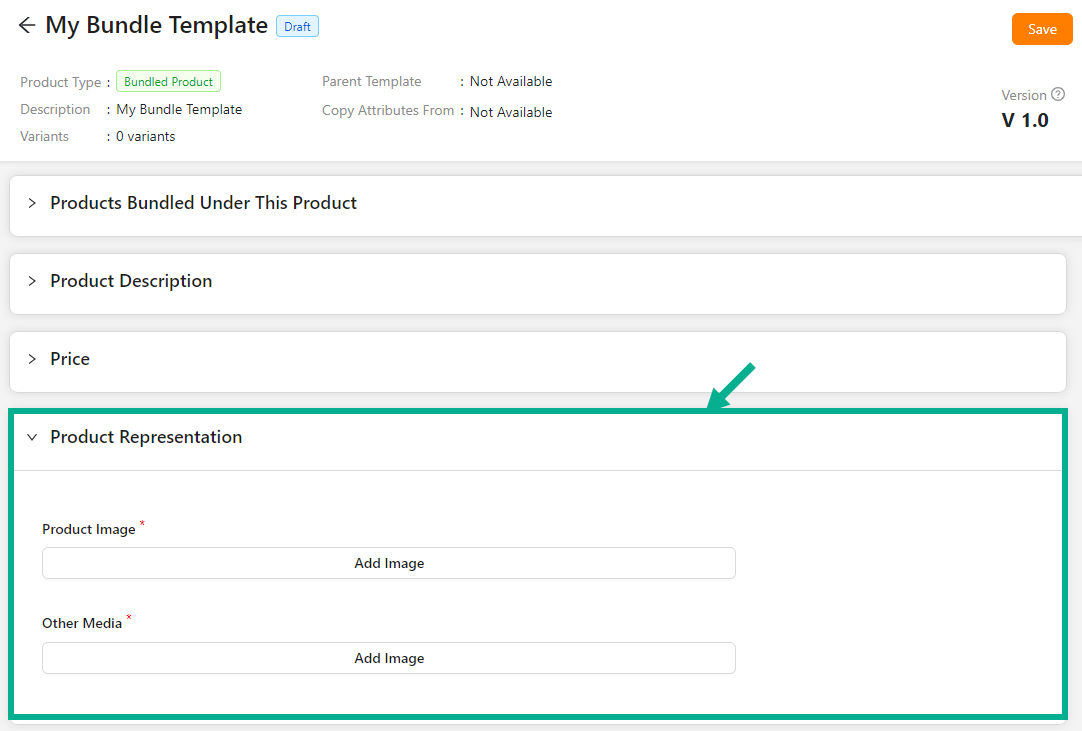
Click Add Image to add the Product Image and Other Media.
From the drop-down list, select the Product Description Layout.
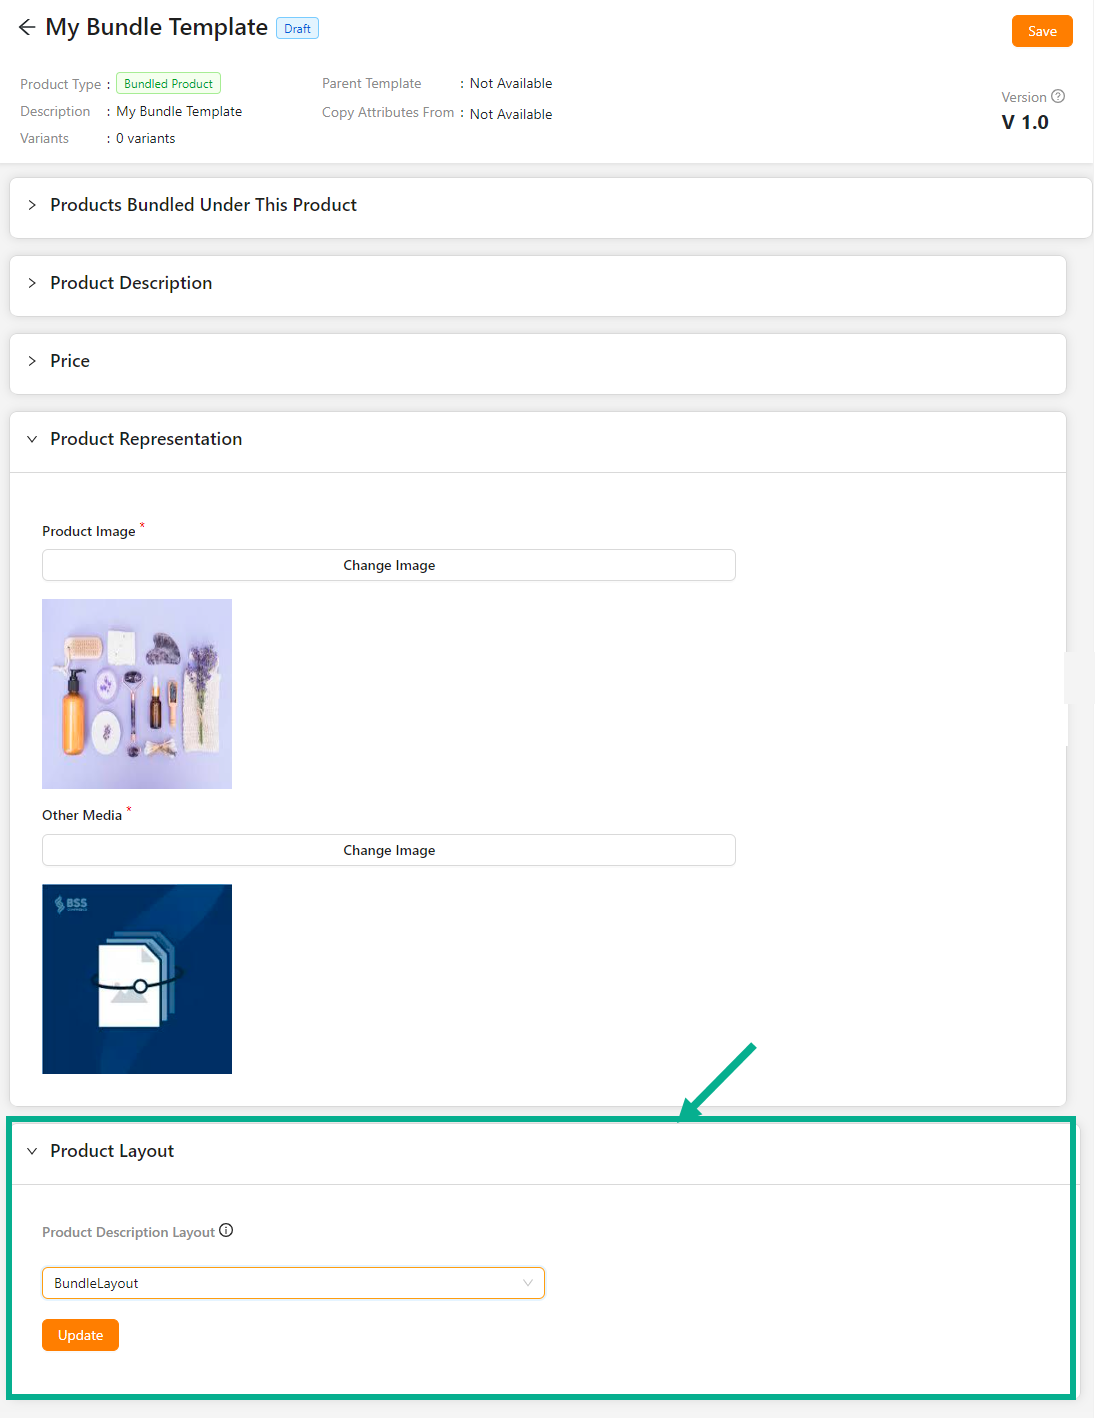
- Click Update.
On updating, the confirmation message appears as shown below.

- Click Save.
On saving, the confirmation message appears as shown below.

Click Submit For Approval button to submit the product for approval.
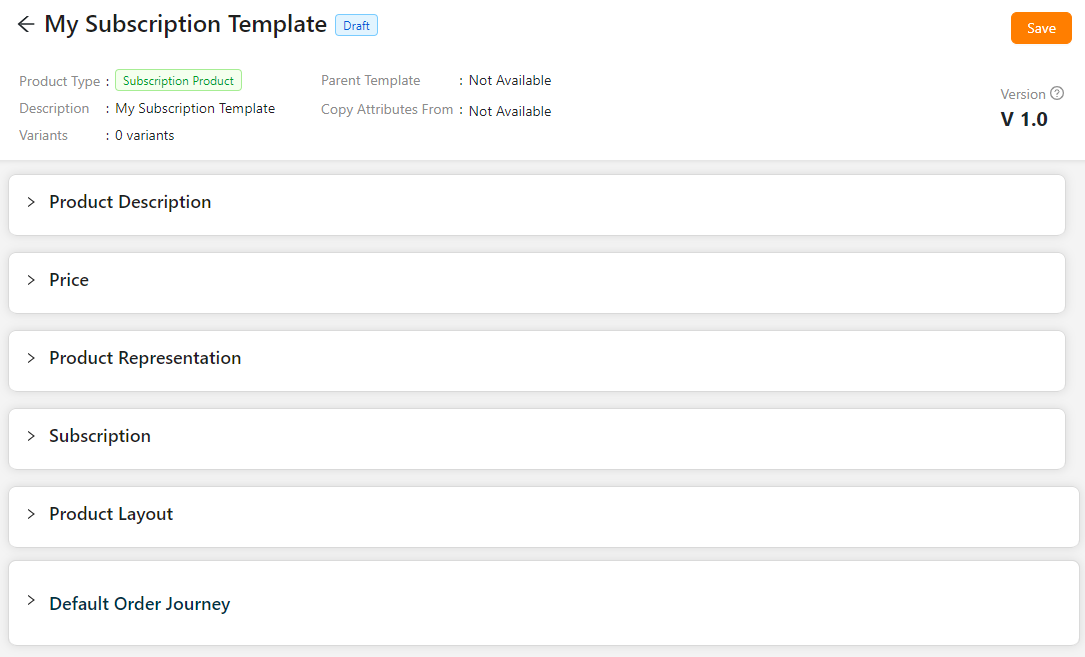
Editing the Subscription Product
- Click the Edit.

The screen appear as shown below.
Enter the Short Description.
Enter the Product Name.
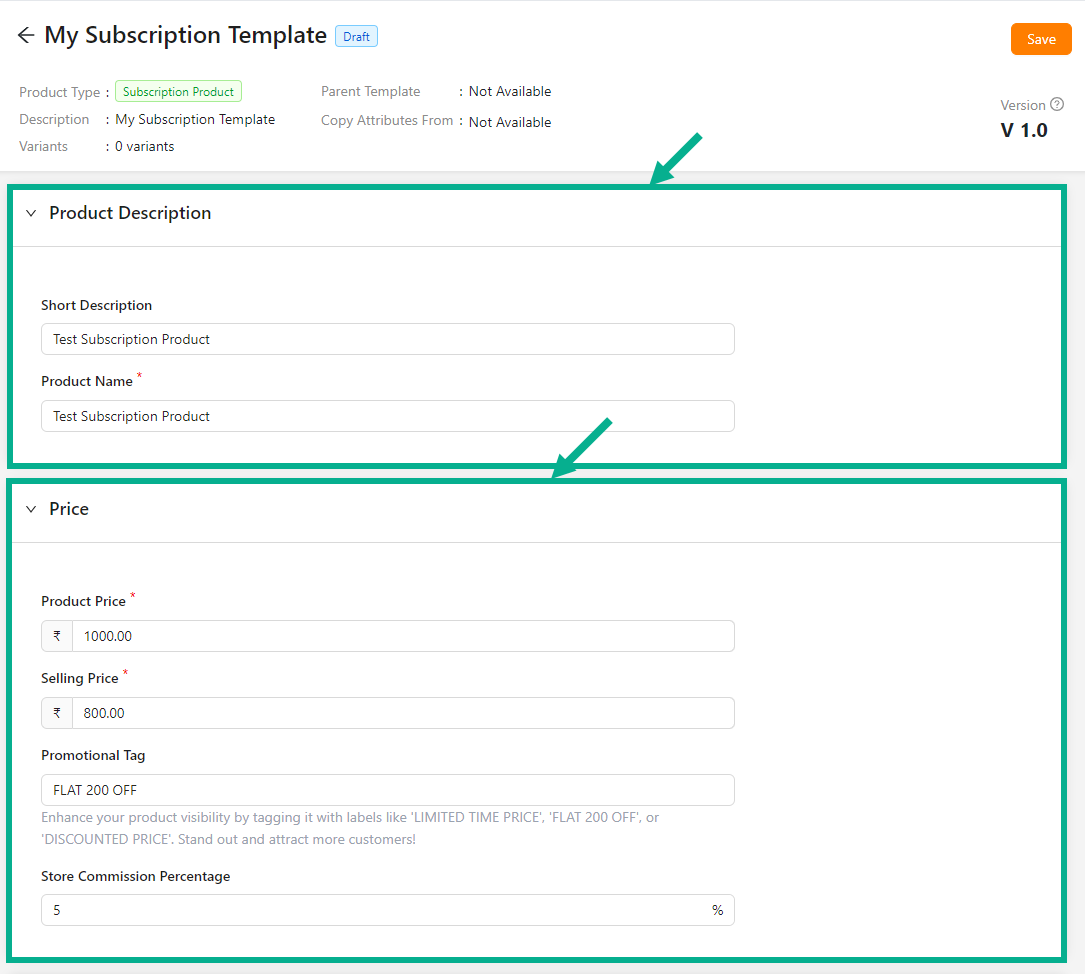
Enter the Product Price, Selling Price, Promotional Tag and Store Commission Percentage.
Click Add Image to add the Product Image and Other Media.
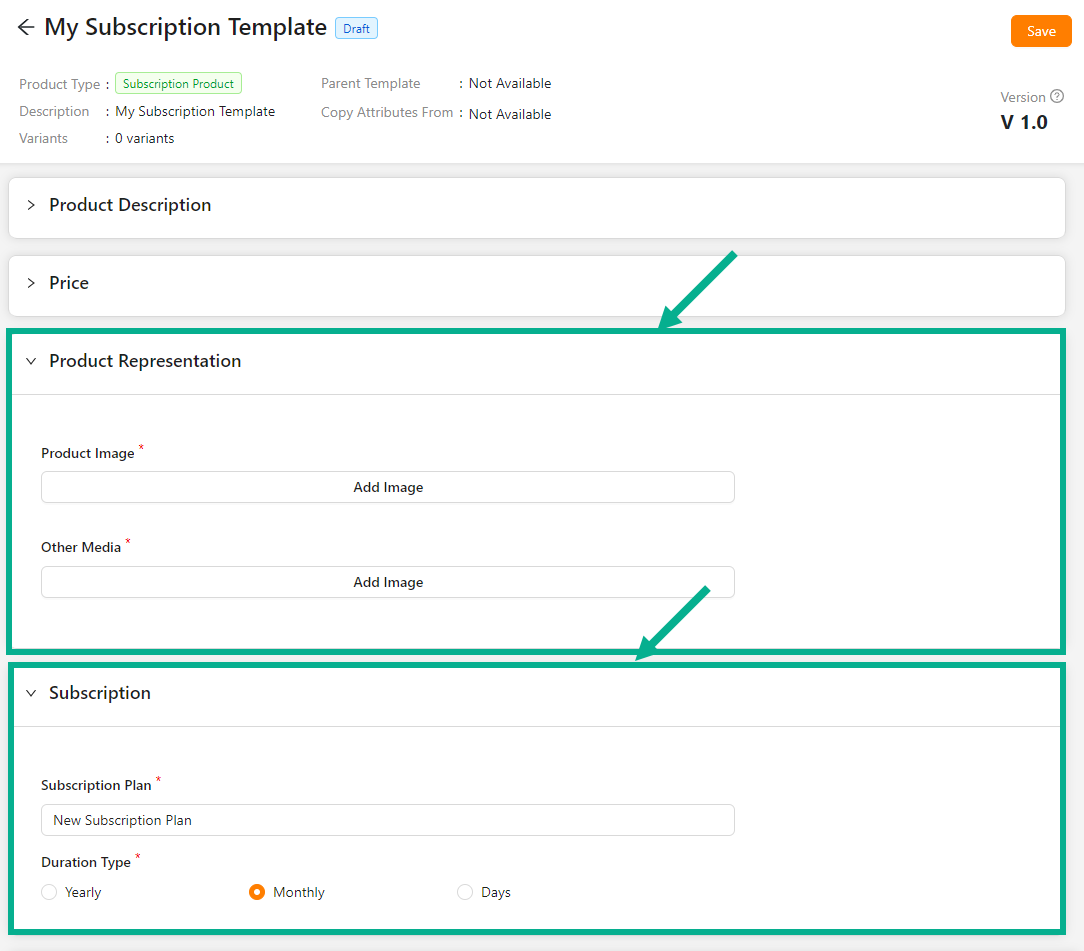
- Enter the Subscription Plan.
The subscription product will not be cancelled automatically, instead the customer has a provision to cancel at any time. Automatic expiring is a customization.
- Select Duration Type among Yearly, Monthly, or Days.
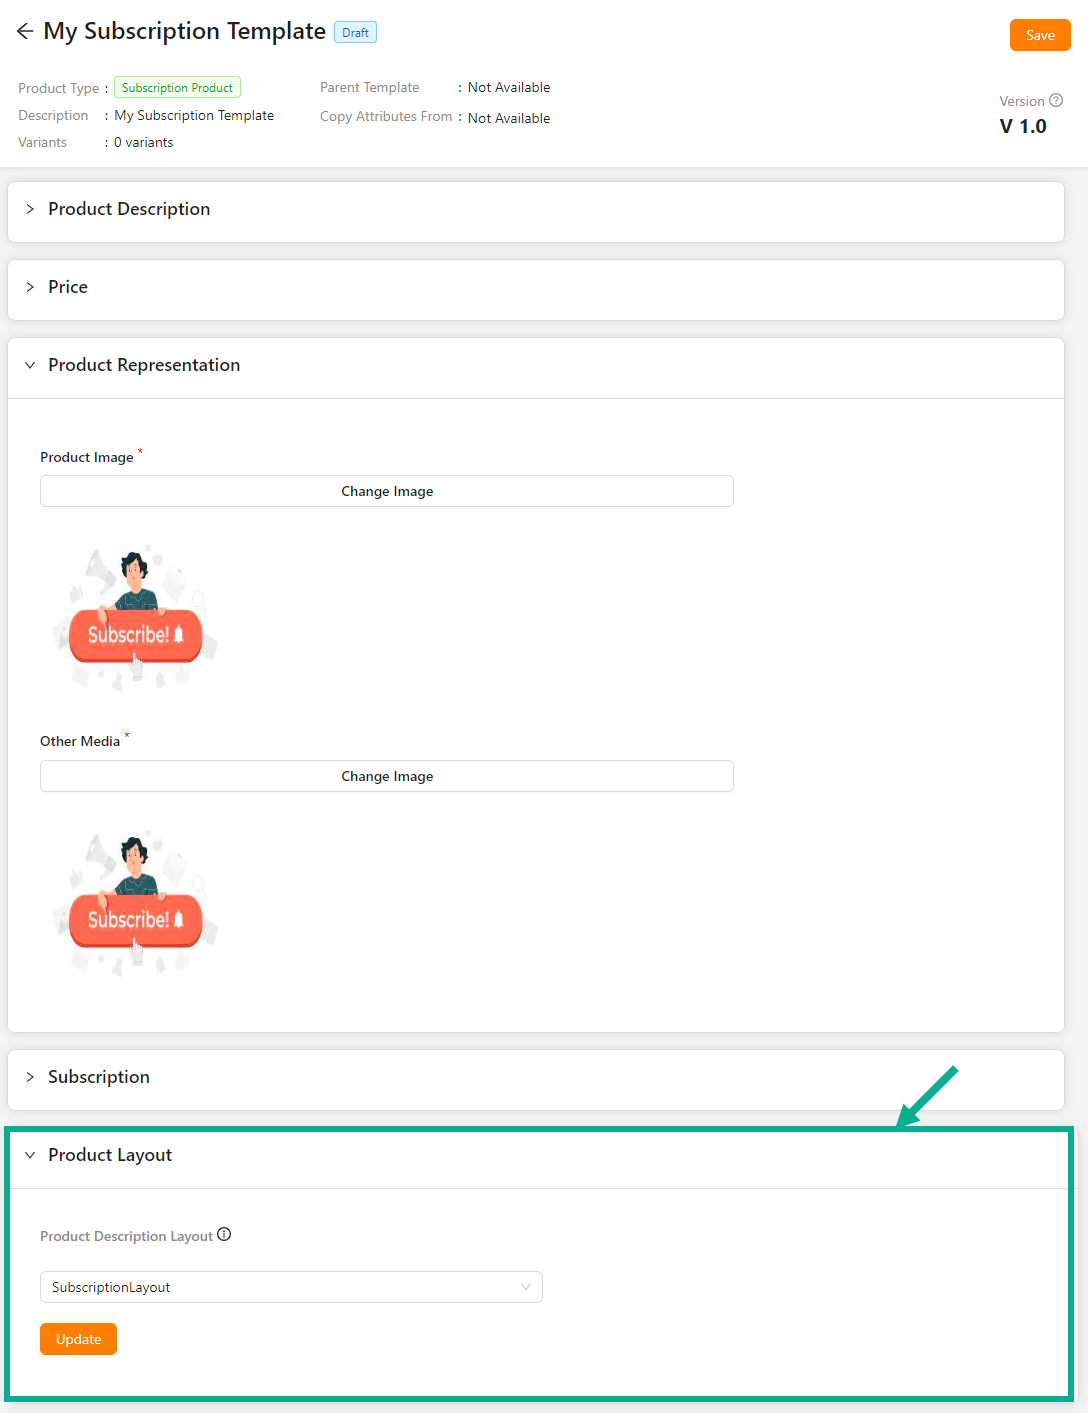
From the drop-down list, select the Product Description Layout.
Click Update.
On updating, the confirmation message appears as shown below.

Select the Default Order Journey as either Subscription Activation, Subscription Cancellation or Subscription Checkout.
Select the Associated Journey from the dropdown.
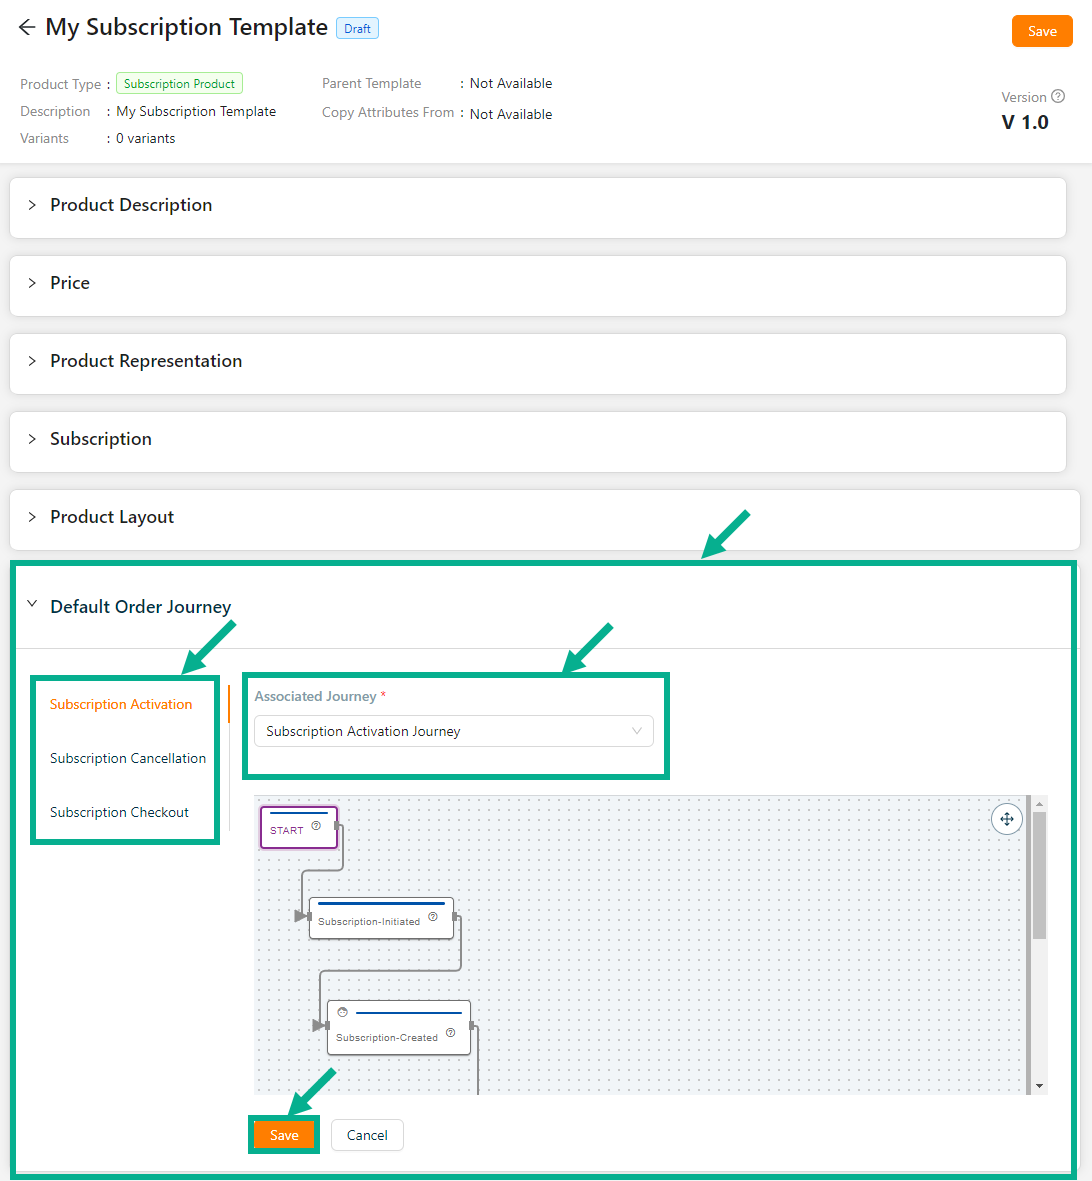
Click the Cancel button to discard the selected Event and Associated Journey.
- Click Update.
On updating, the confirmation message appears as shown below.
- Click Save.
On saving, the confirmation message appears as shown below.

Click Submit For Approval button to submit the product for approval.
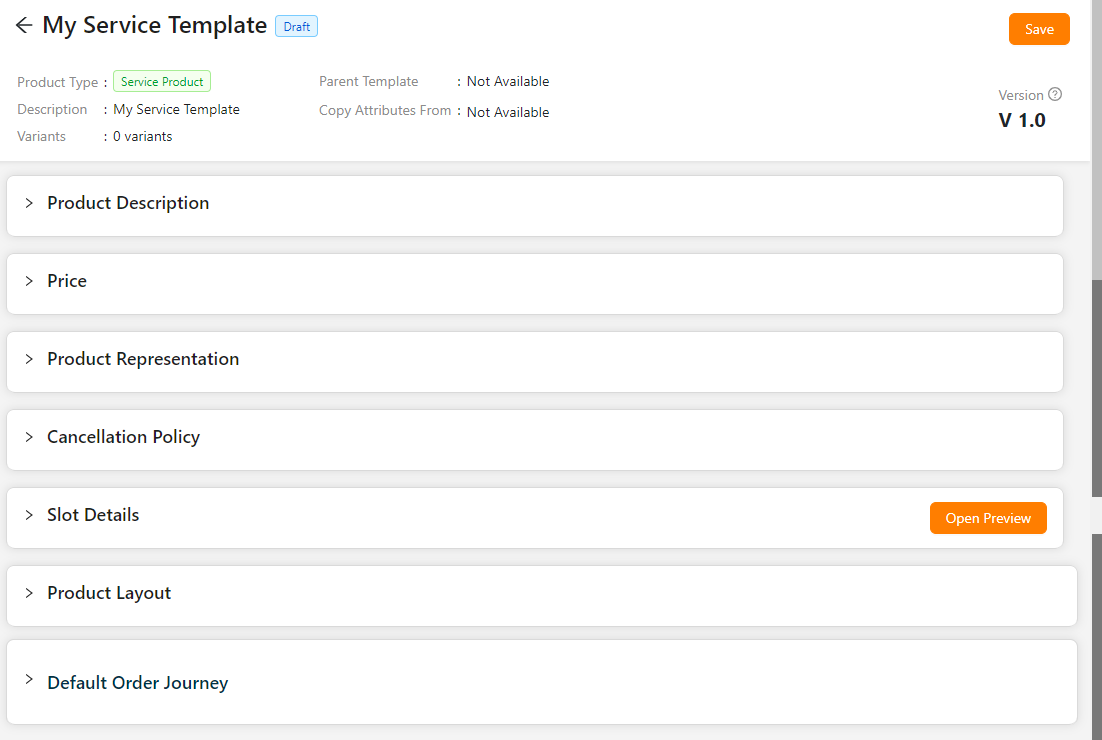
Editing the Service Product
- Click the Edit.

The screen appear as shown below.
- Enter the Short Description, Service Details, and Product Name.
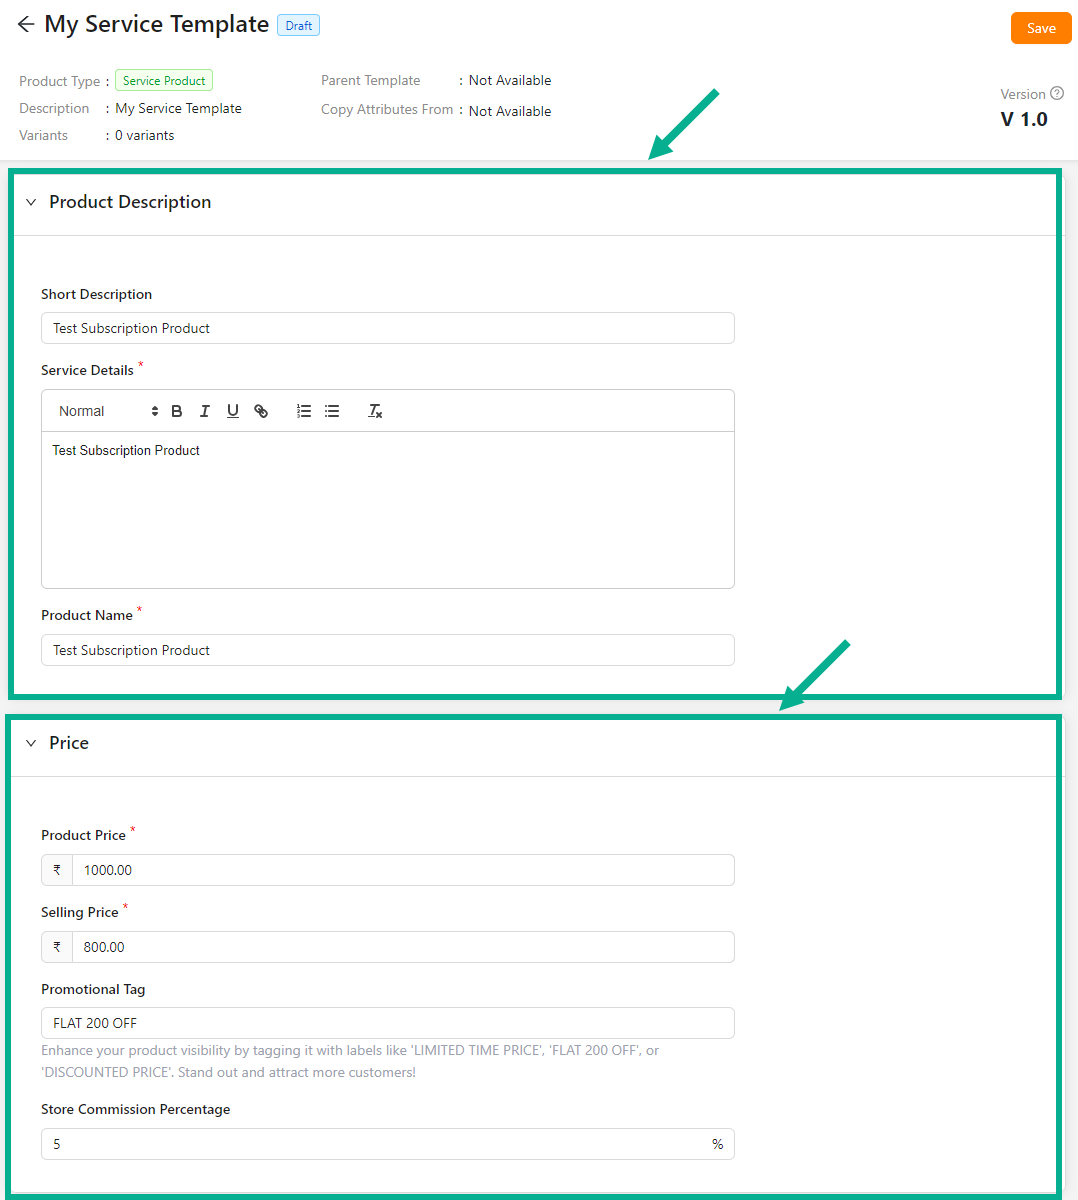
Enter the Product Price, Selling Price, Promotional Tag and Store Commission Percentage.
Click Add Image to add the Product Image and Other Media.
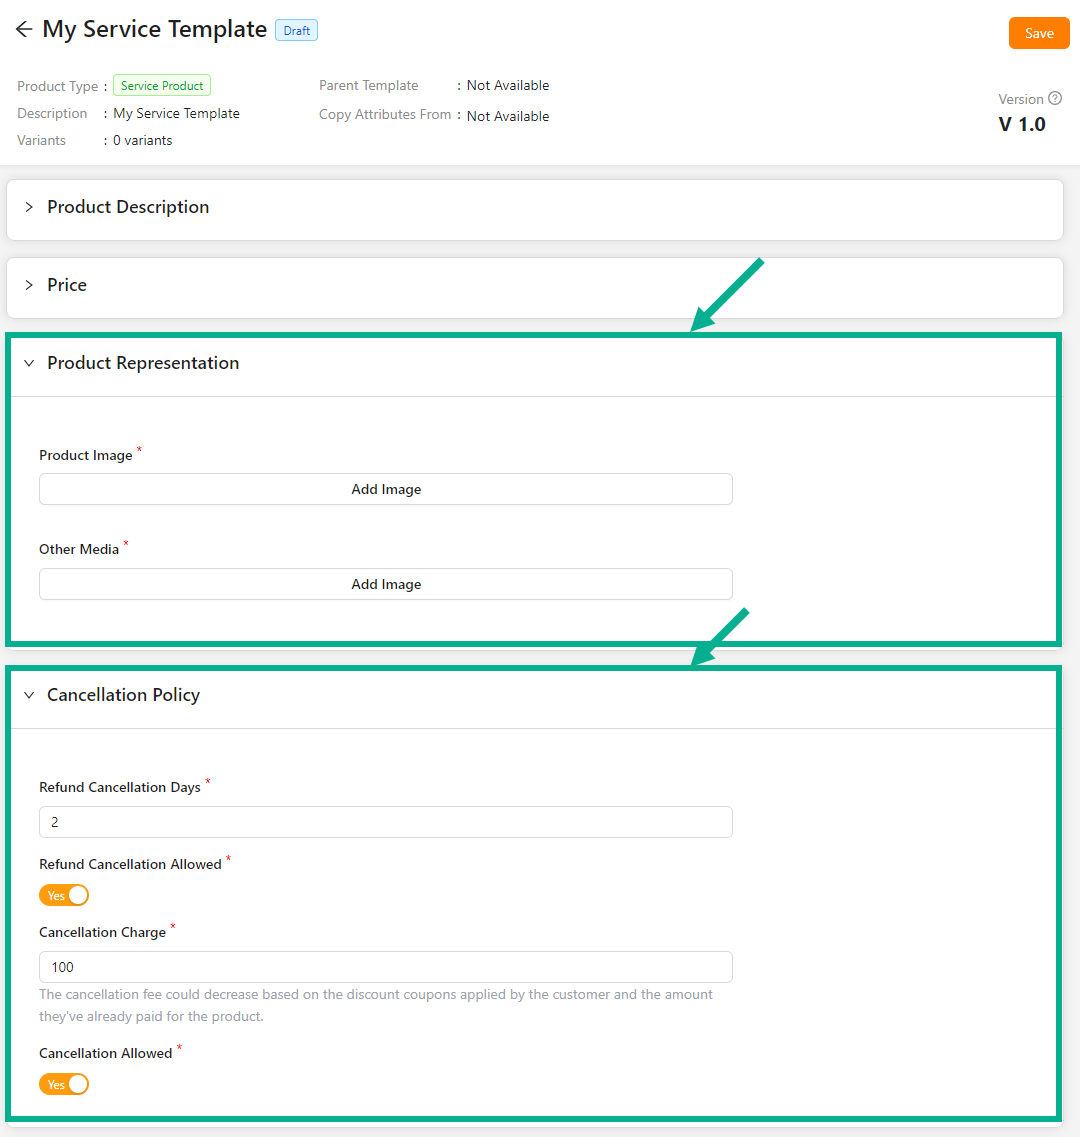
Enter the Refund Cancellation Days.
Enable the Refund Cancellation Allowed toggle if the product can be refunded.
Enter the Cancellation Charge.
Enable the Cancellation Allowed toggle if the product can be cancelled.
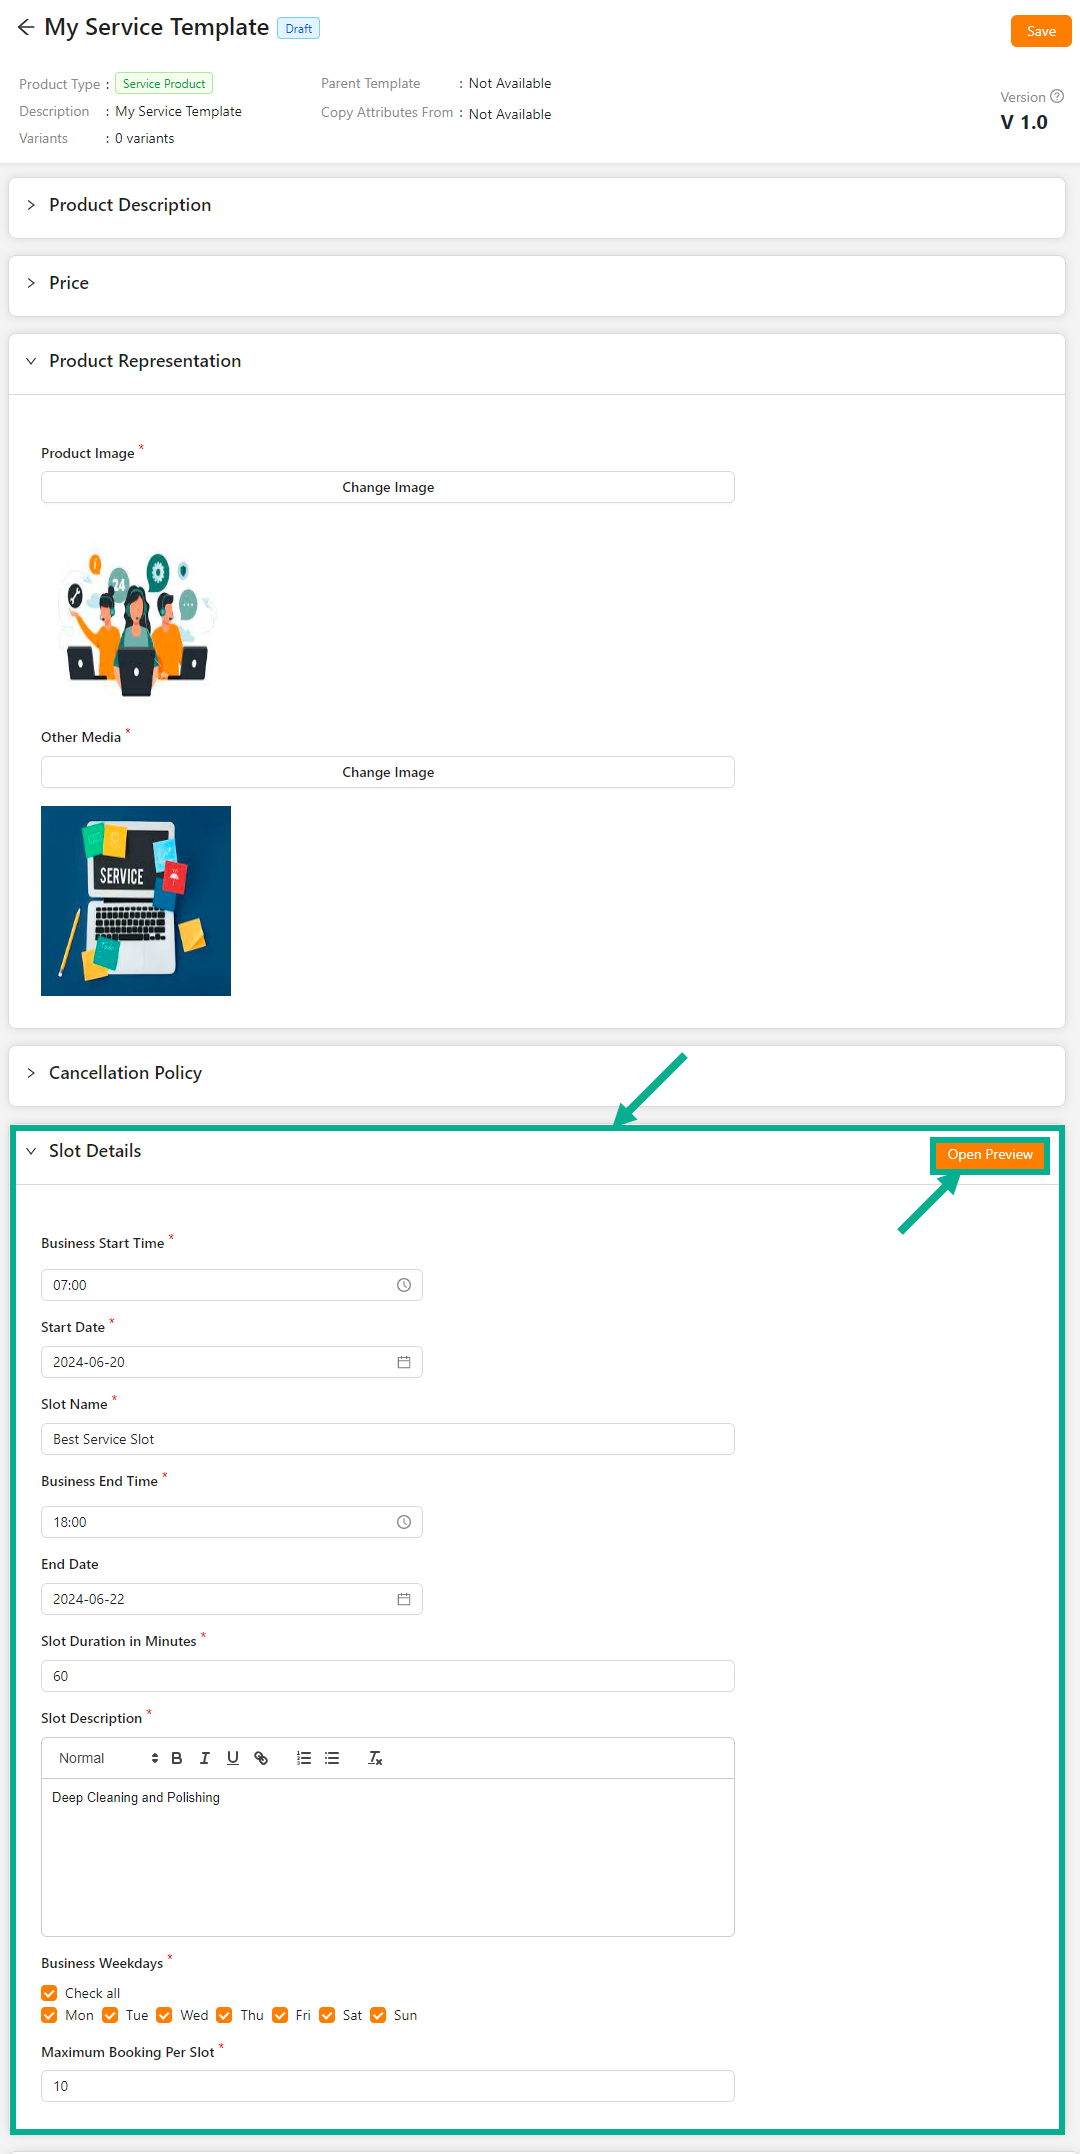
Click the Open Preview button to view the slot preview before publishing the service product.

Select the Business Start Time using the time picker.
Select the Start Date using the date picker.
Enter the Slot Name.
Select the Business End Time using the time picker.
Select the End Date using the date picker.
Enter the Slot Duration in Minutes.
Enter the Slot Description.
Click the respective check boxes to choose the Business Weekdays.
Enter the Maximum Booking Per Slot.
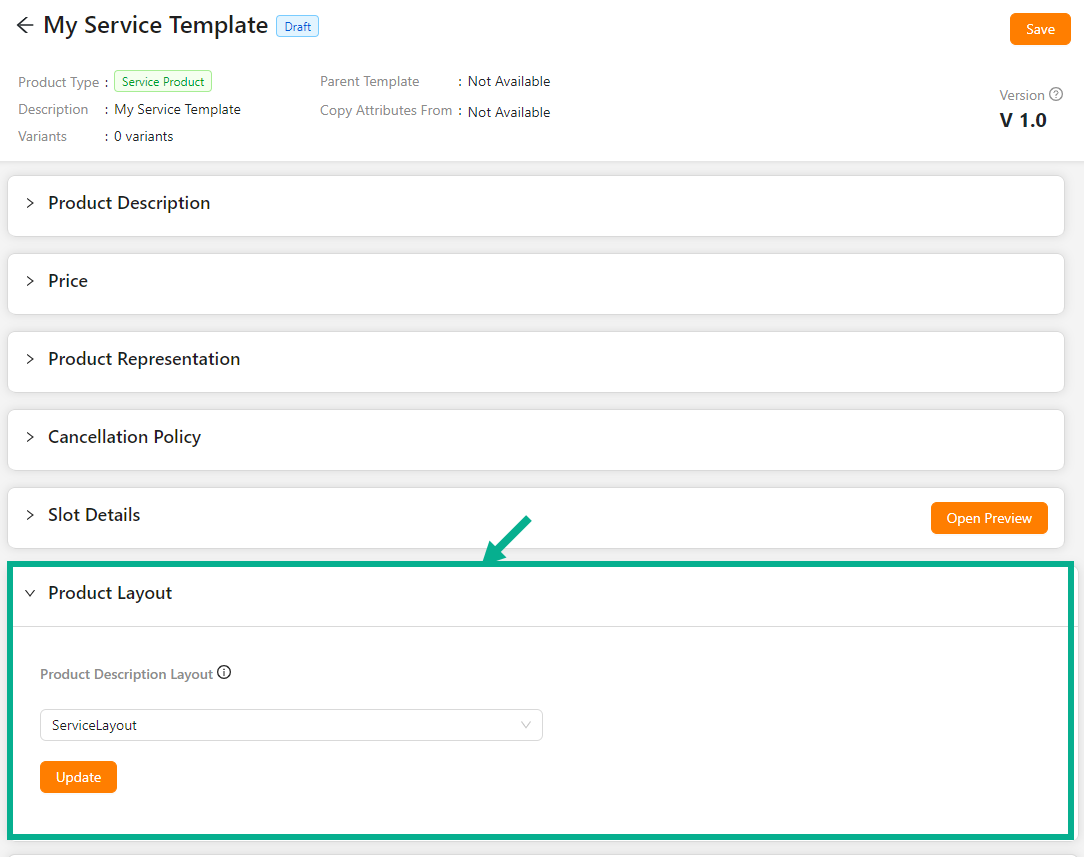
From the drop-down list, select the Product Description Layout.
Click Update.
On updating, the confirmation message appears as shown below.

Select the Default Order Journey as either Booking Fulfillment, Booking Cancellation or Service Checkout.
Select the Associated Journey from the dropdown.
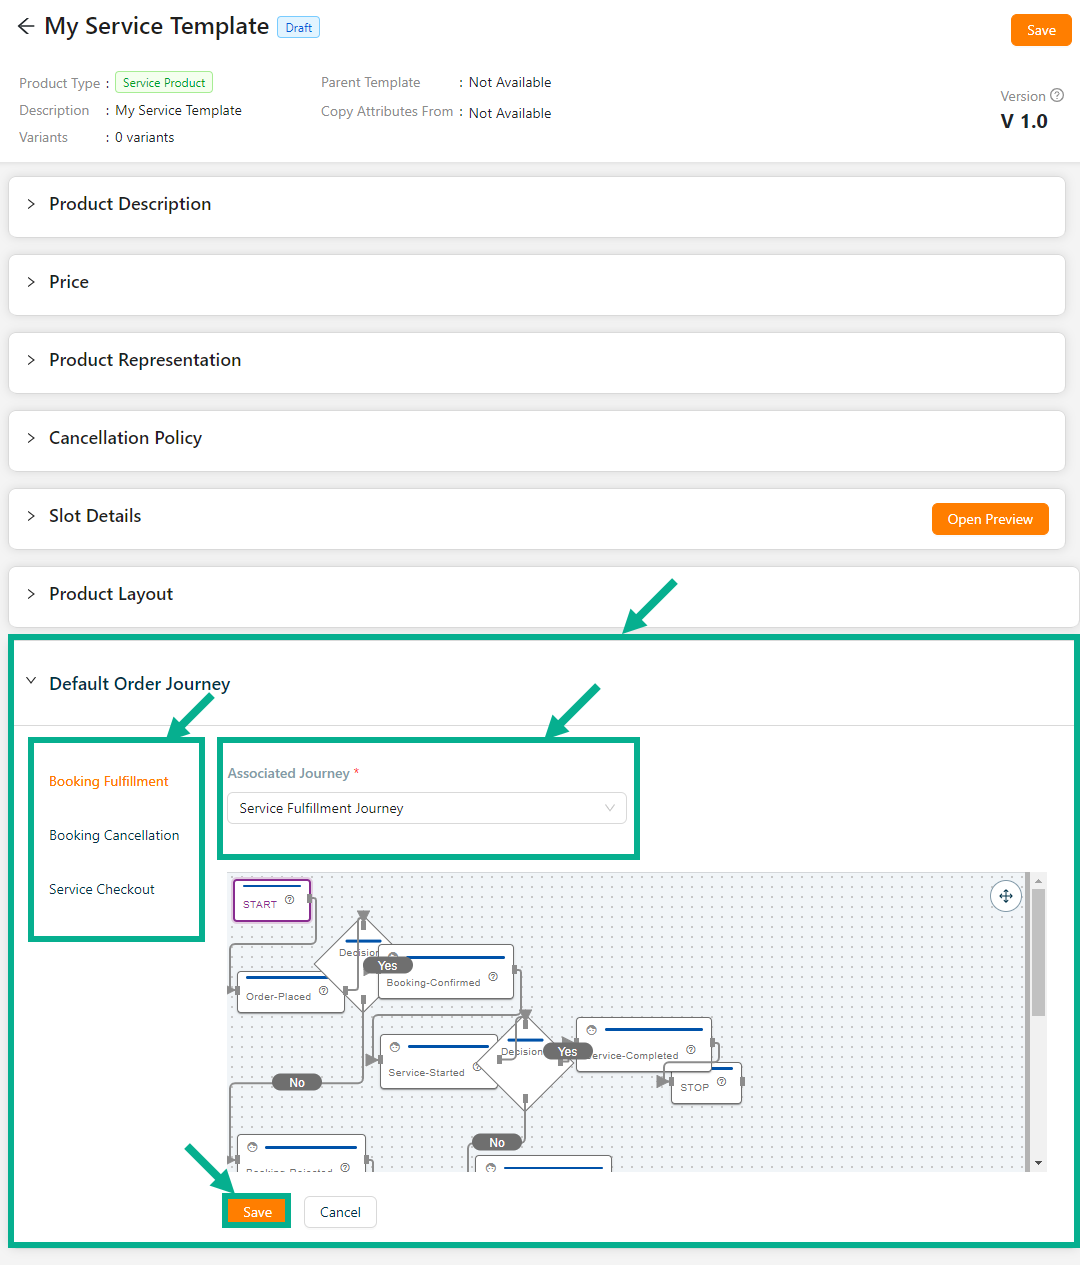
Click the Cancel button to discard the selected Event and Associated Journey.
- Click Update.
On updating, the confirmation message appears as shown below.

- Click Save.
On saving, the confirmation message appears as shown below.

Click Submit For Approval button to submit the product for approval.
Editing the Digital Product
- Click the Edit icon.

The screen appear as shown below.
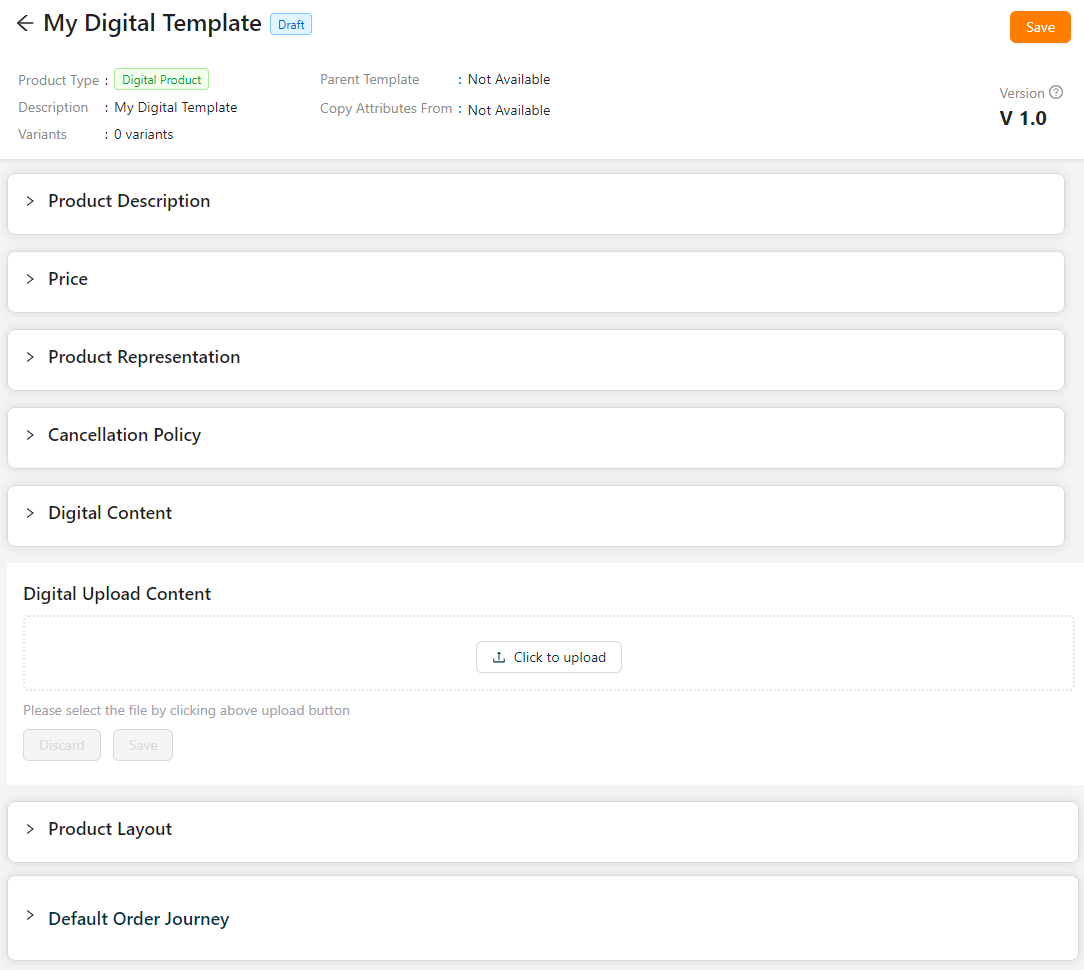
- Enter the Short Description, Product Name, and Manage Content Button Name.
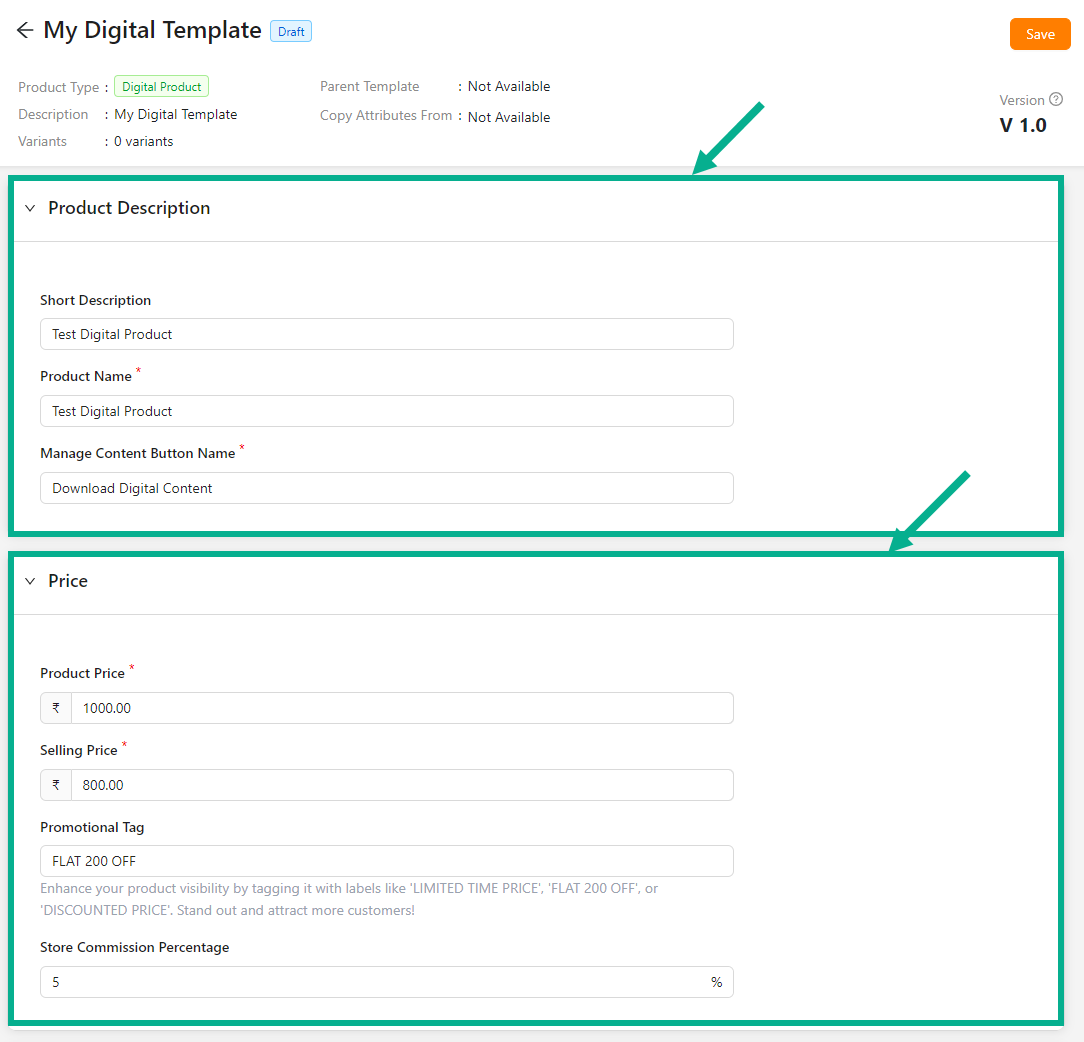
Enter the Product Price, Selling Price, Promotional Tag and Store Commission Value.
Click Add Image to add the Product Image and Other Media.
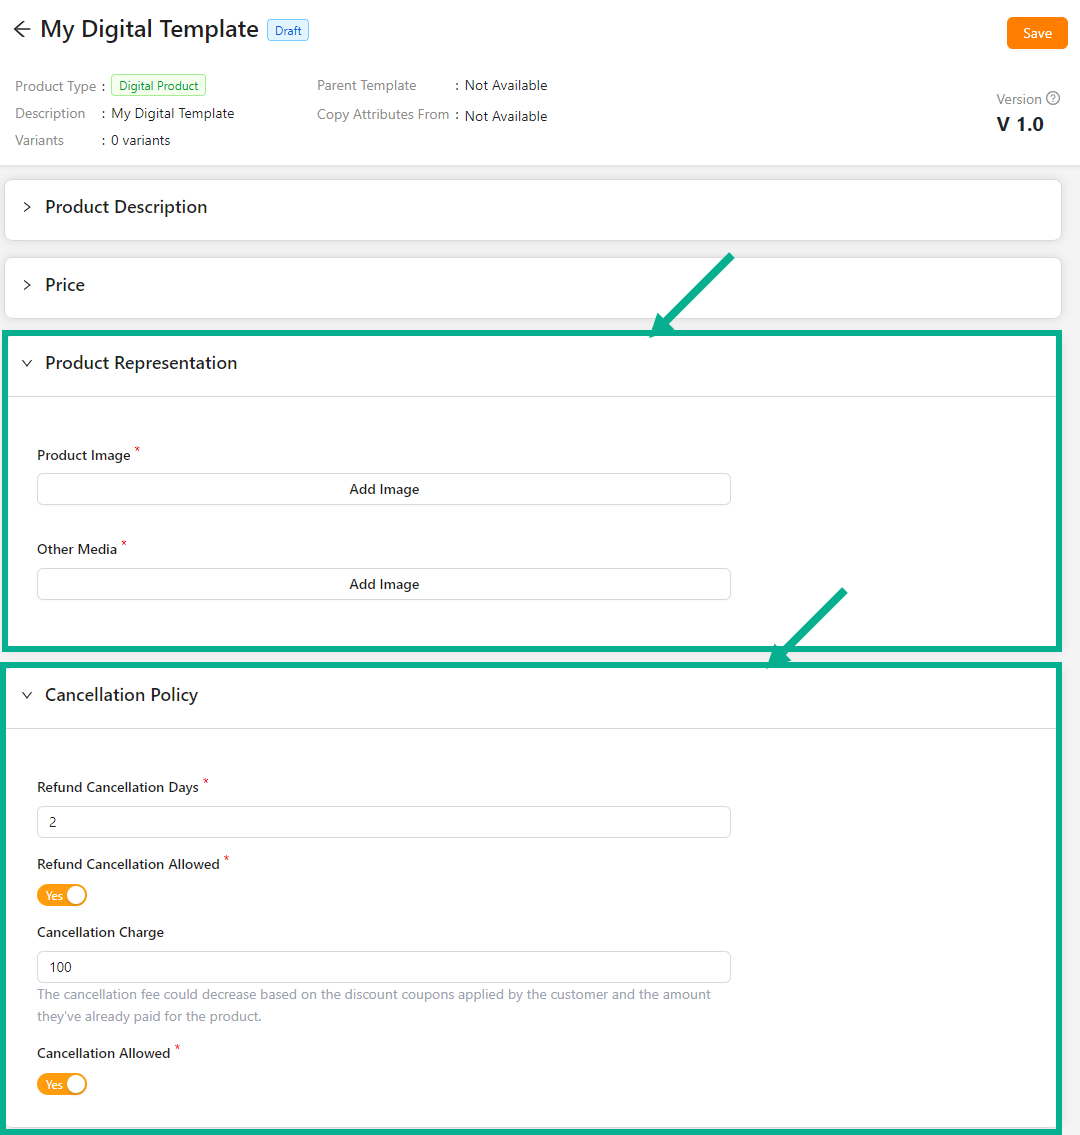
Enter the Refund Cancellation Days.
Enable the Refund Cancellation Allowed toggle if the product can be refunded.
Enter the Cancellation Charges.
Enable the Cancellation Allowed toggle if the product can be cancelled.
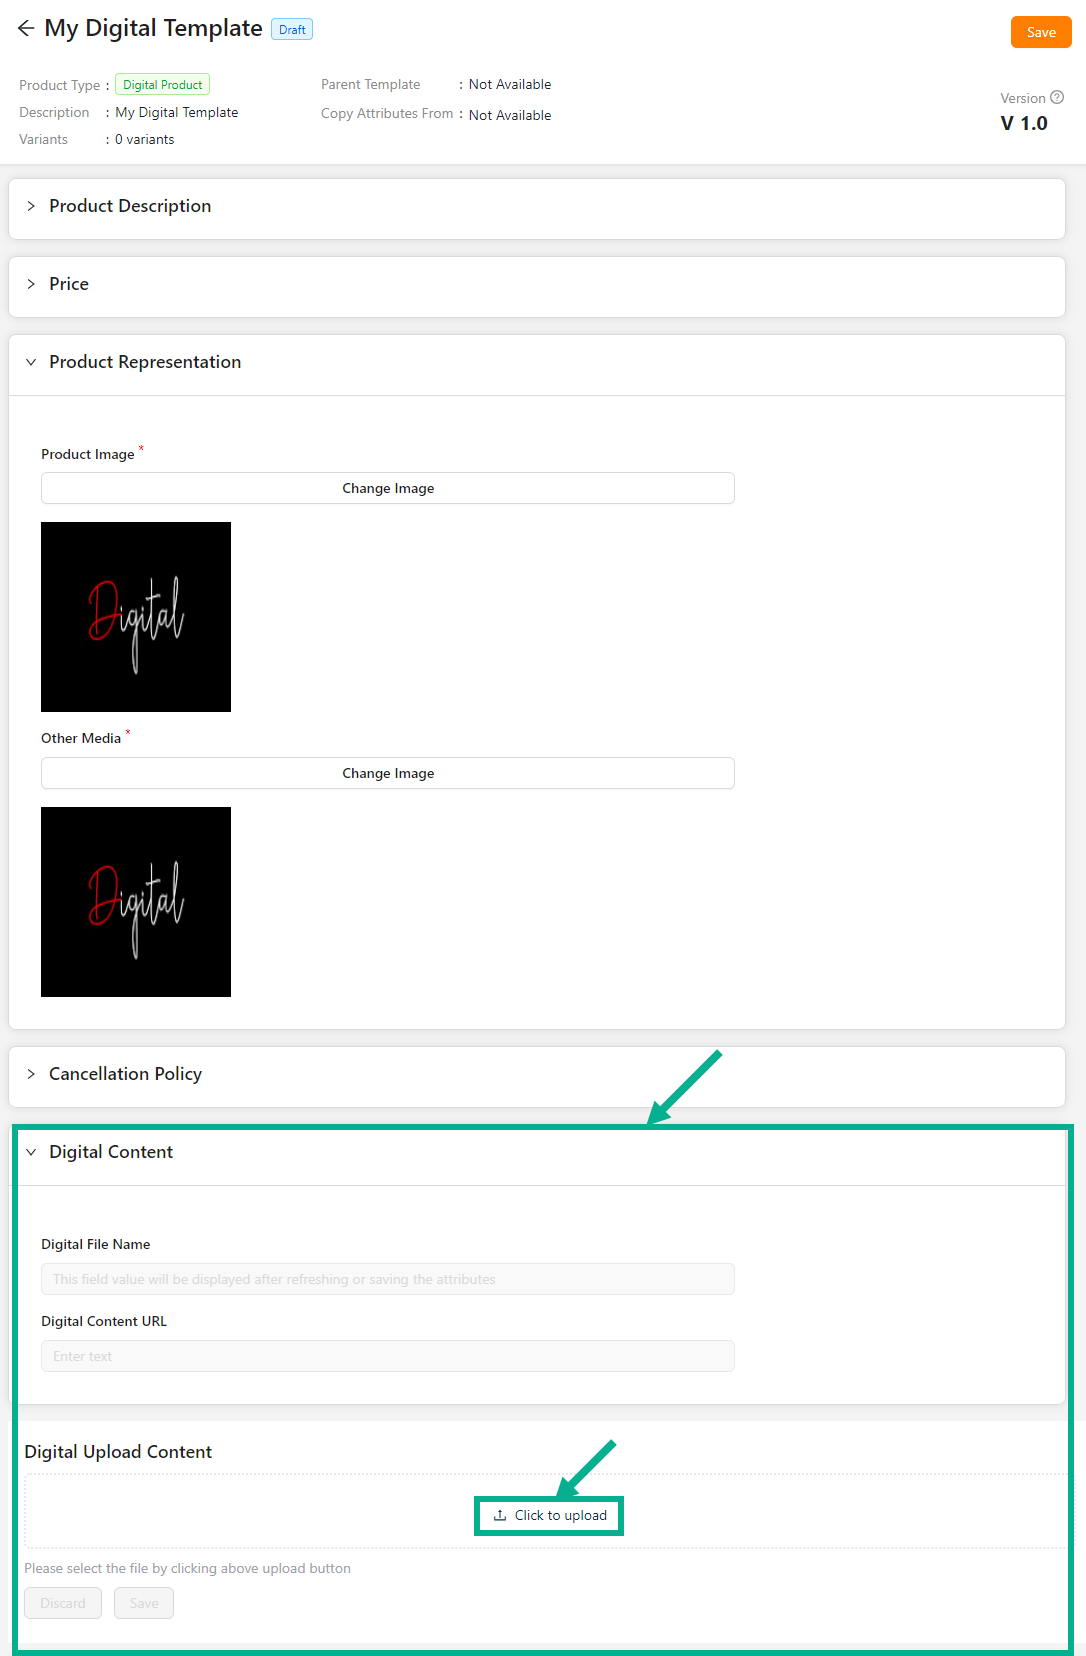
- Click to upload the digital file.
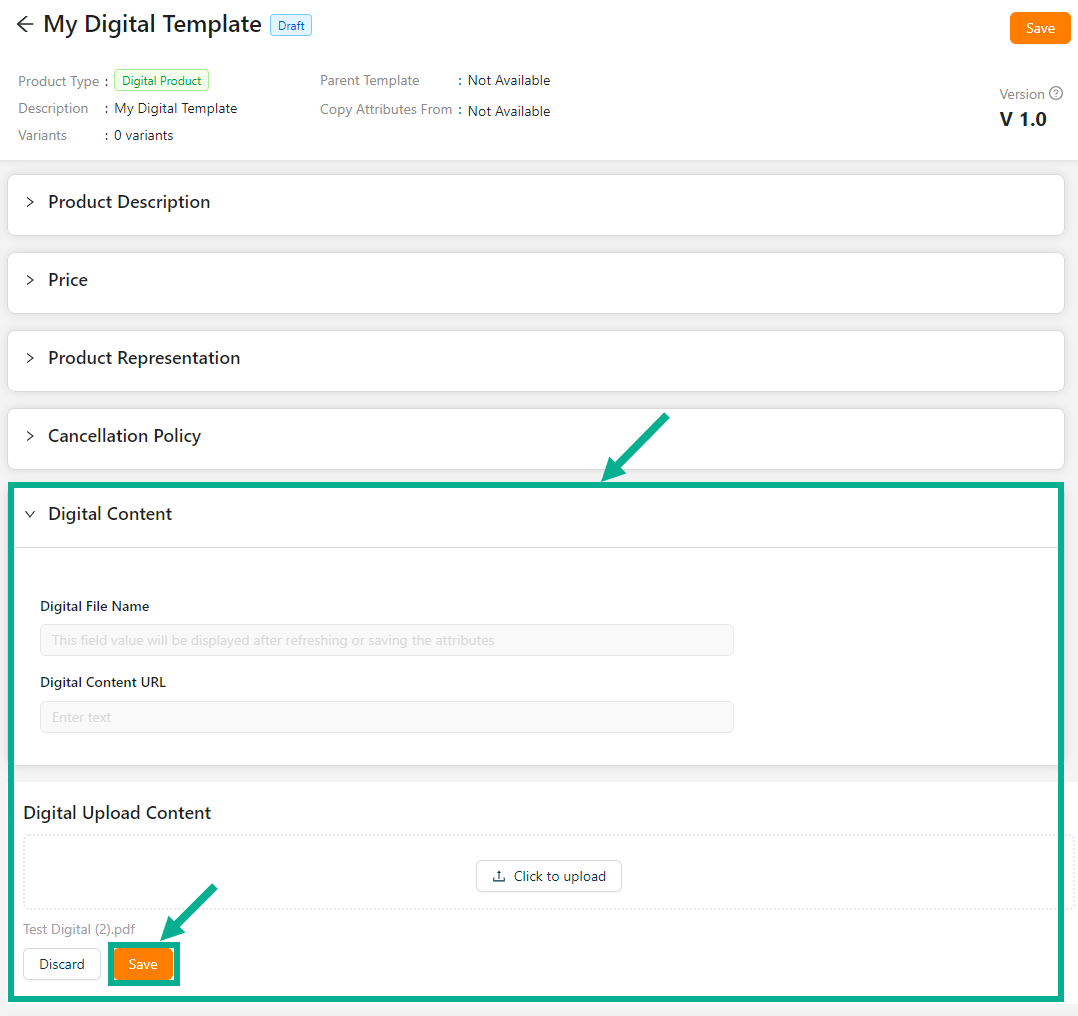
- Click Save.
On saving, the confirmation message appears as shown below.

The Digital Content URL and Digital File name will show after saving or refreshing the page.
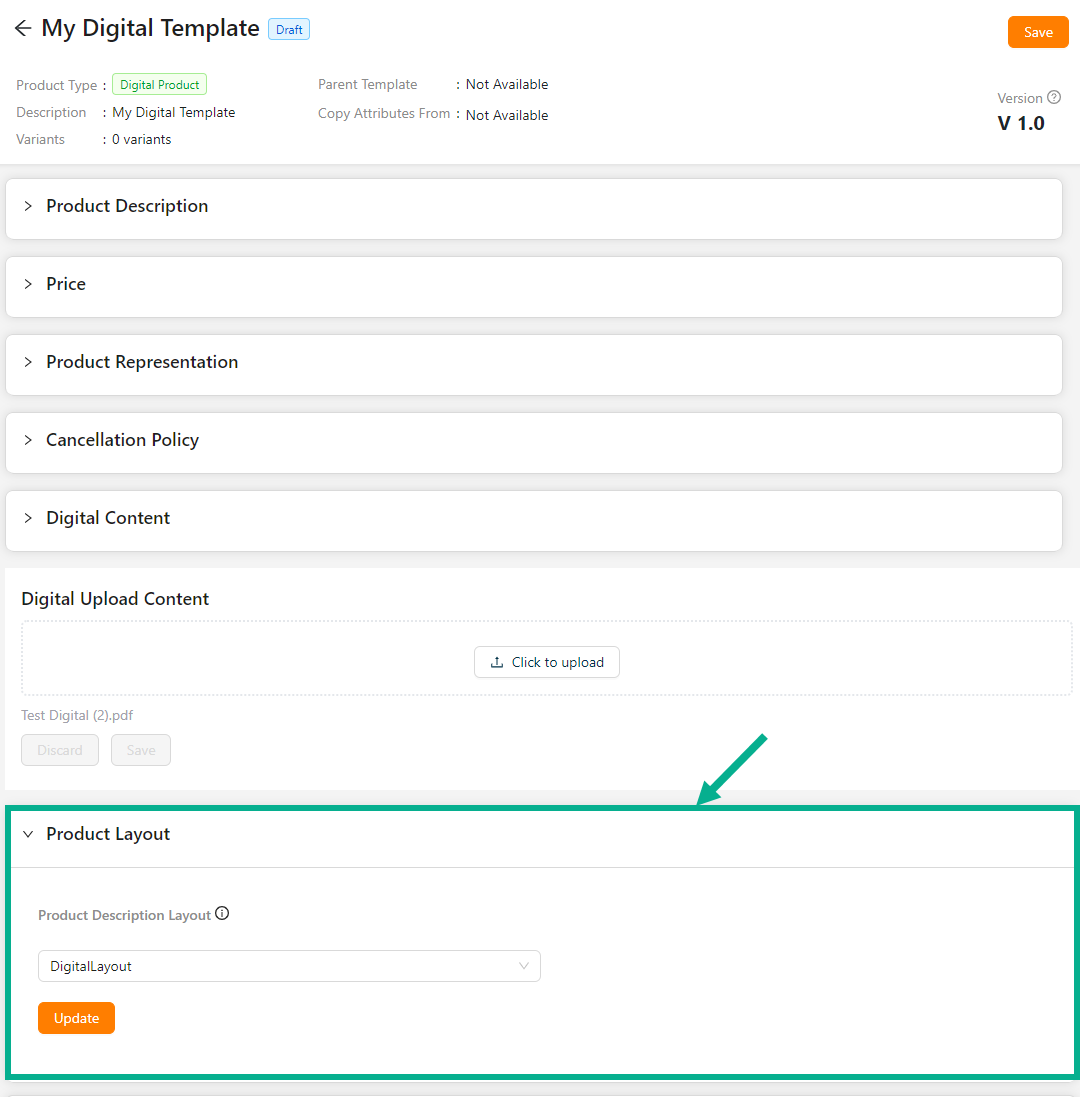
From the drop-down list, select the Product Description Layout.
Click Update.
On updating, the confirmation message appears as shown below.

Select the Default Order Journey as either Digital Activation, Digital Cancellation or Digital Checkout.
Select the Associated Journey from the dropdown.
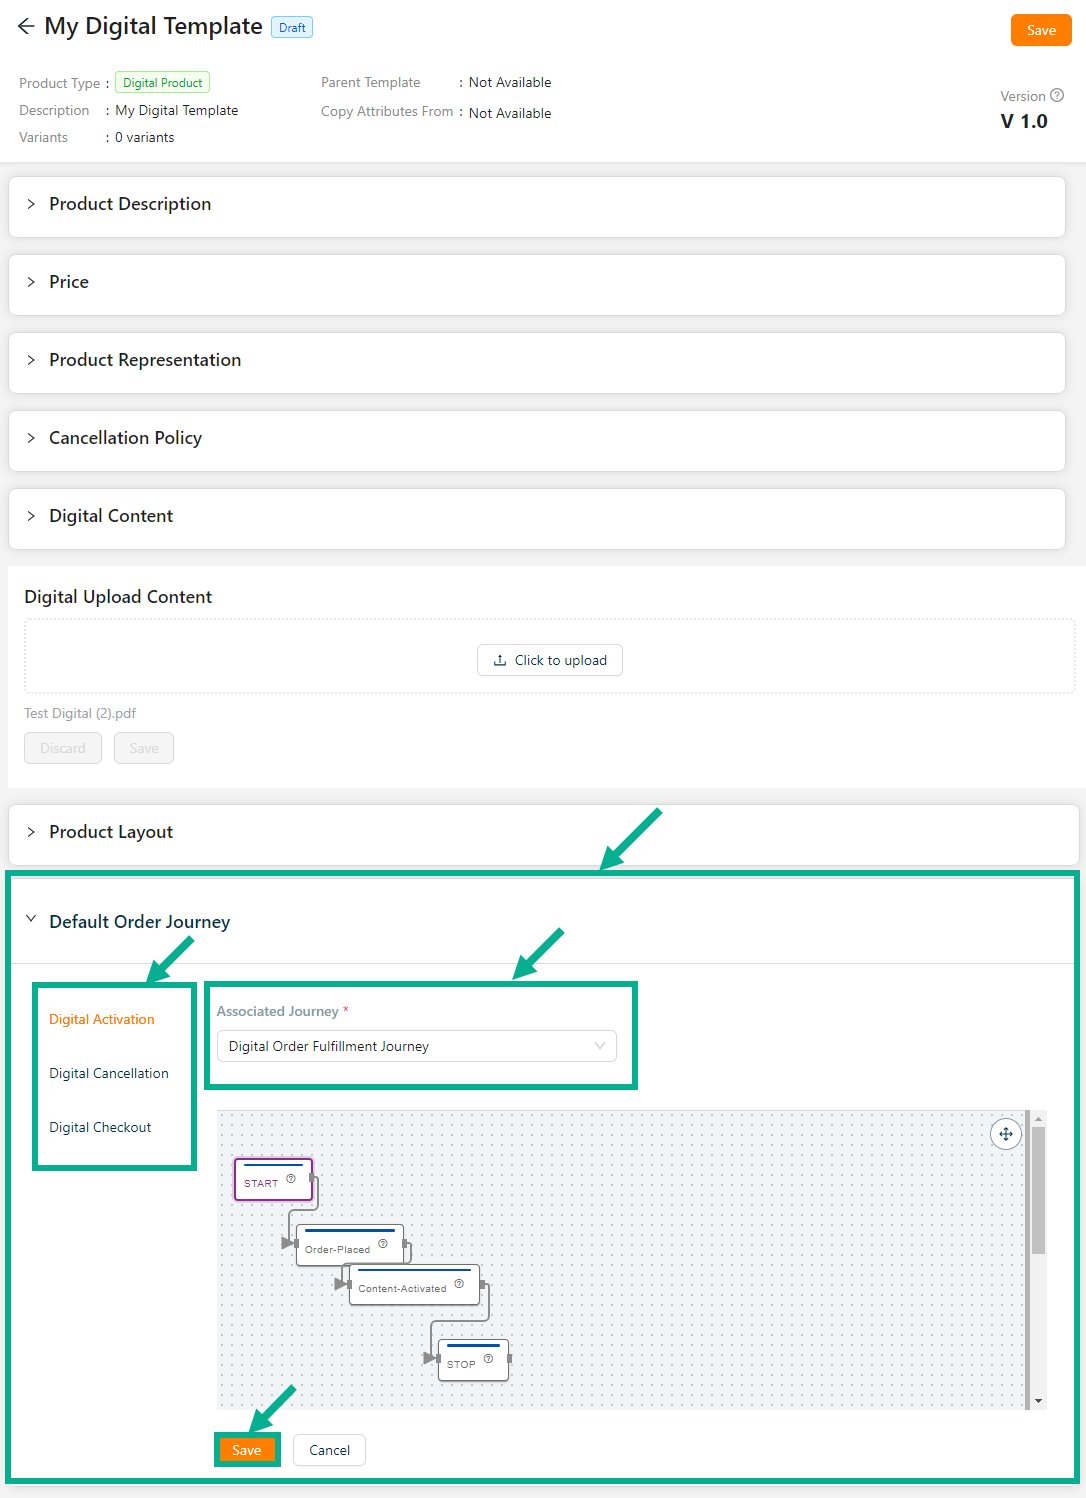
Click the Cancel button to discard the selected Event and Associated Journey.
- Click Update.
On updating, the confirmation message appears as shown below.

- Click Save.
On saving, the confirmation message appears as shown below.

Click Submit For Approval button to submit the product for approval.
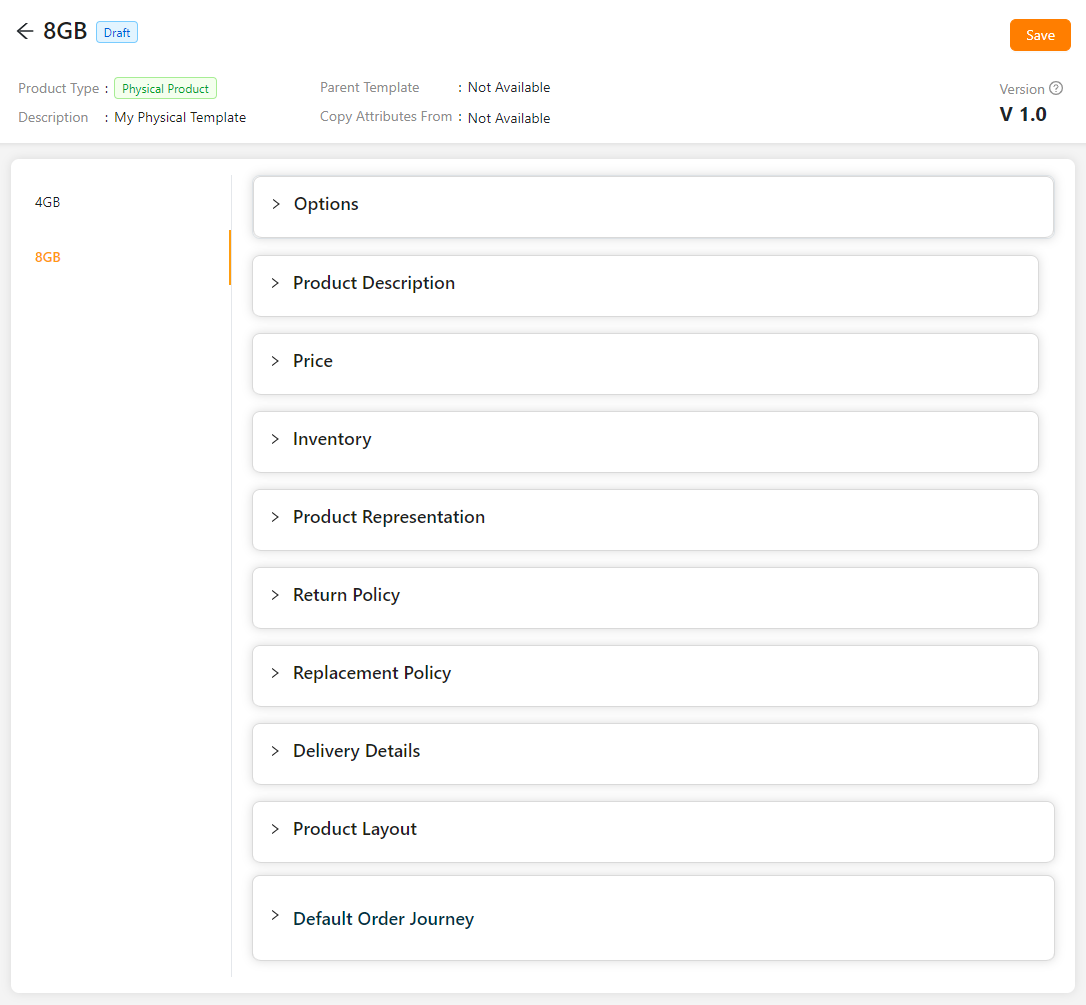
Editing the Physical Product
Example: If two variants are selected while creating a product, two products will be created within the product tab.
- Click the Edit.

The respective variant details page appear as shown below.
Enter the Short Description.
Enter the Product Name.
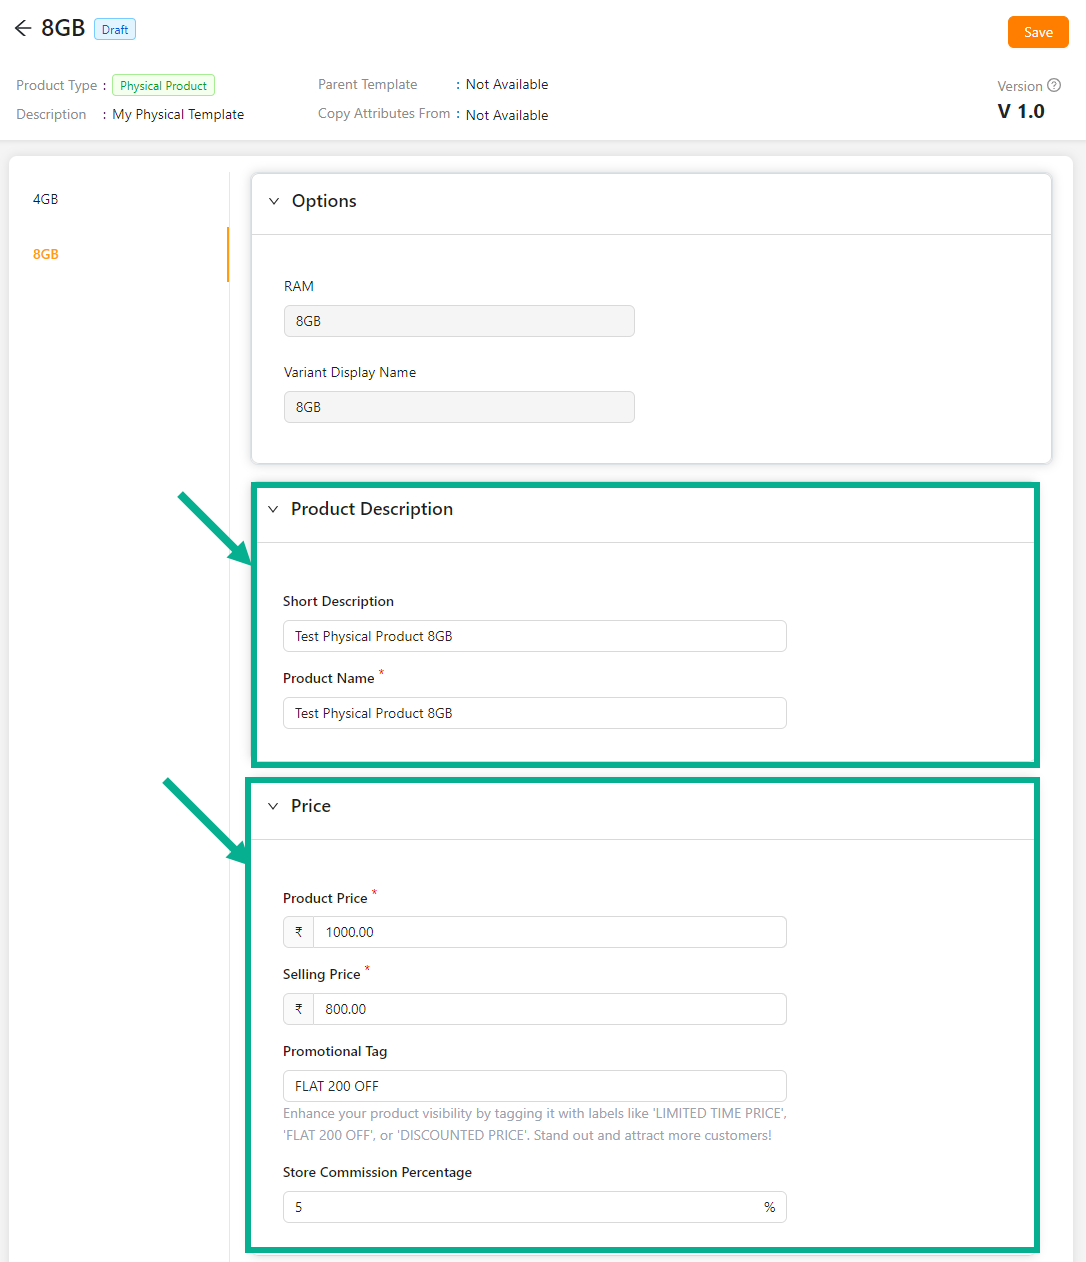
Enter the Product Price, Selling Price, Promotional Tag and Store Commission Percentage.
Enter the Quantity.
Based on the stock’s availability, the vendor administrator can alter (increase or decrease) the quantity under the Inventory section.
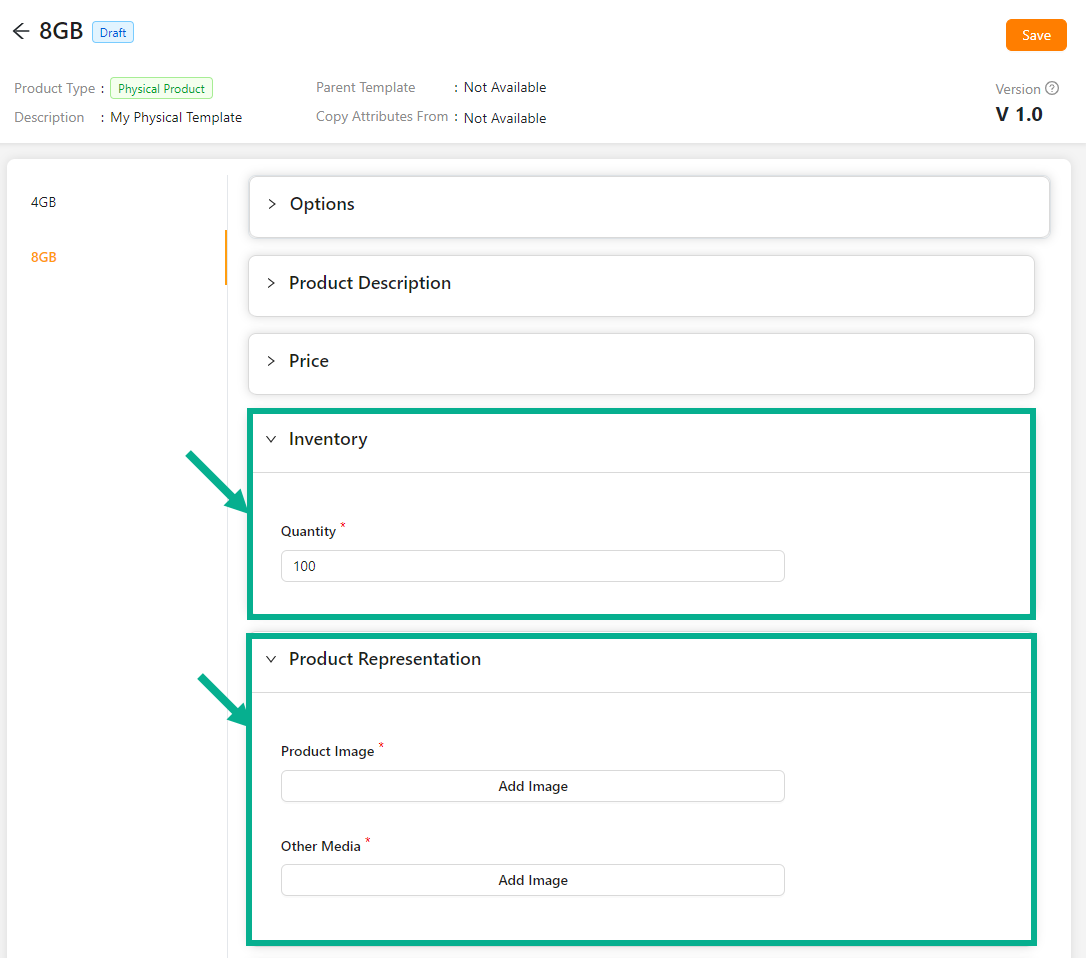
- Click Add Image to add the Product Image and Other Media.
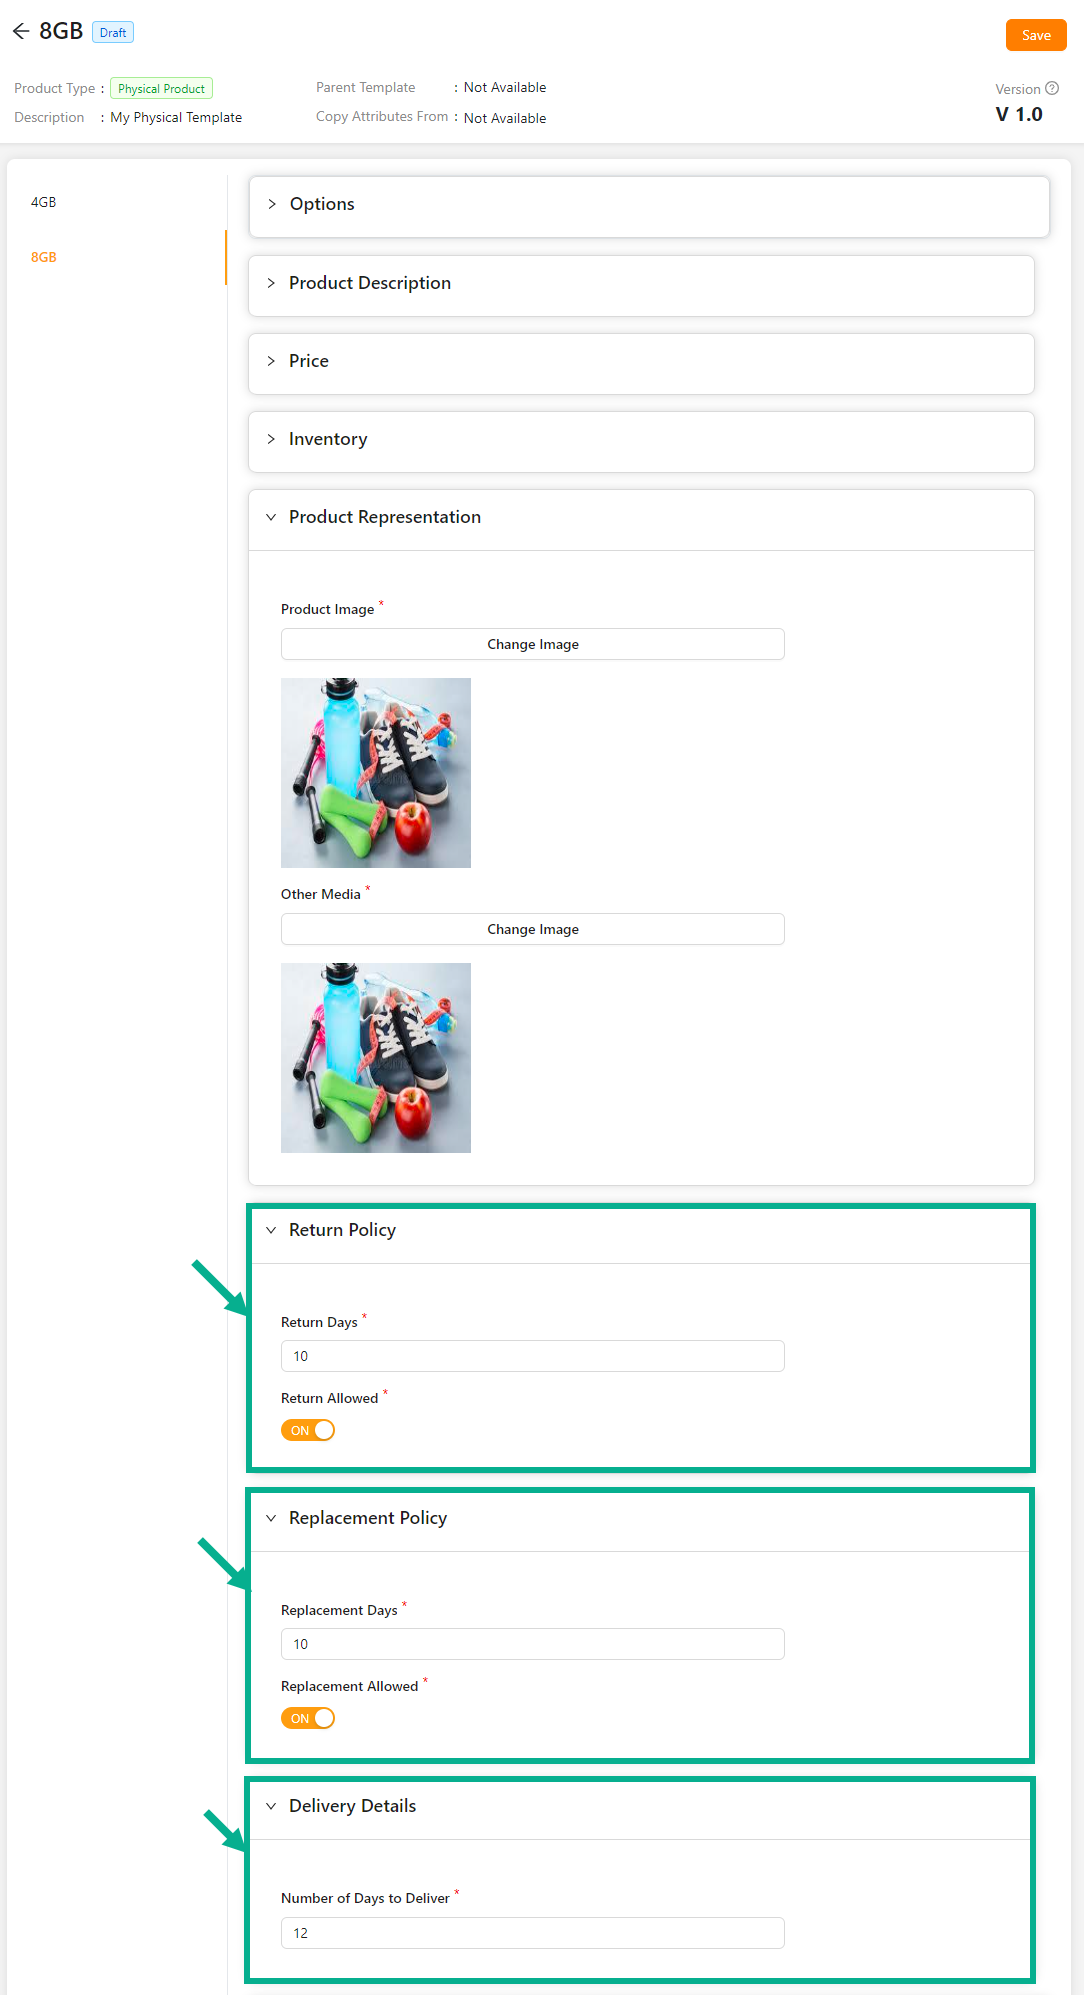
Enter the Return Days.
Enable the Return Allowed toggle if the product can be returned.
Enter the Replacement Days.
Enable the Replacement Allowed toggle if the product can be replaced.
Enter the Number of Days to Deliver.
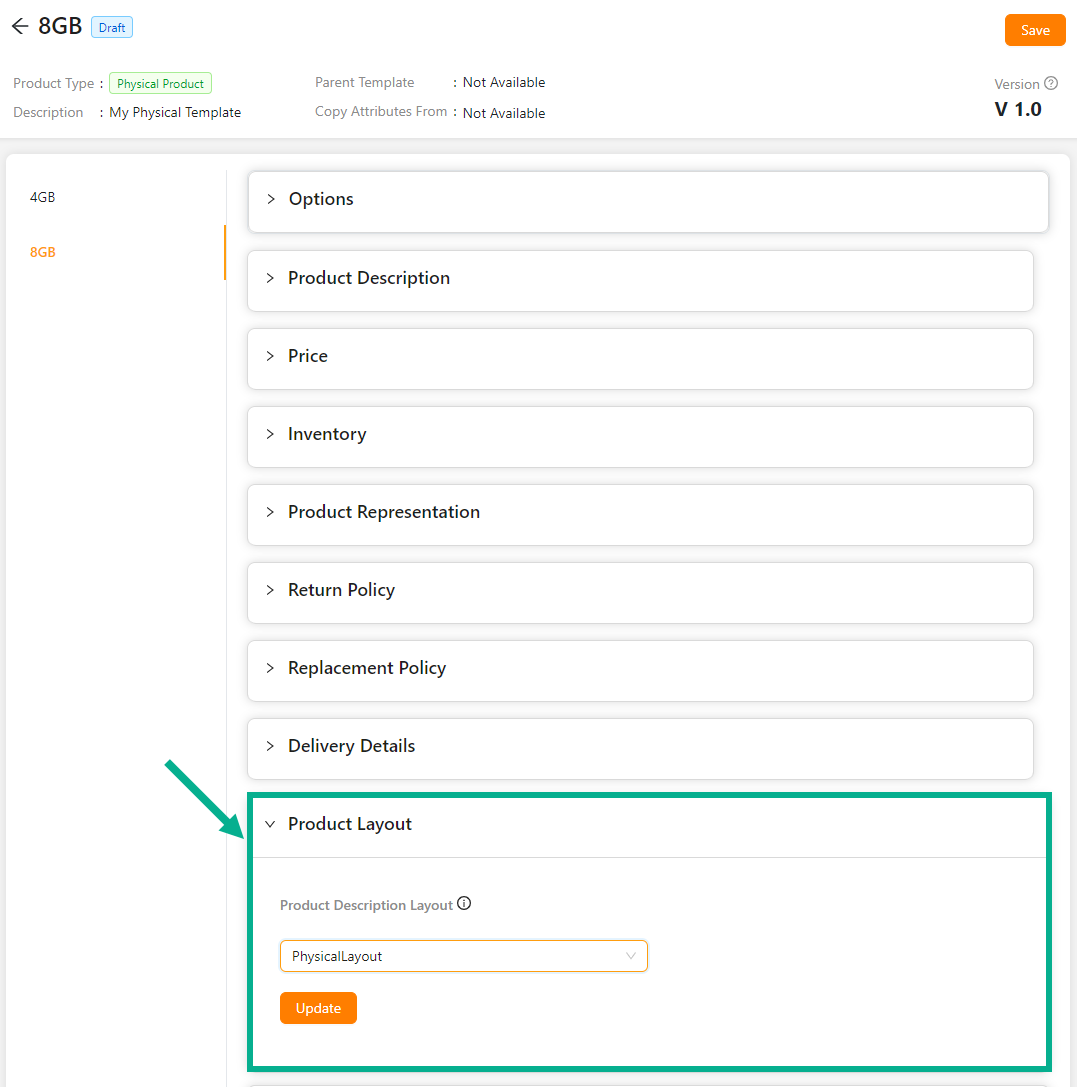
From the drop-down list, select the Product Description Layout.
Click Update.
On updating, the confirmation message appears as shown below.

Select the Default Order Journey as either Order Item Fulfillment, Order Item Return, Order Item Replacement, Order Item Cancellation or Physical Checkout.
Select the Associated Journey from the dropdown.
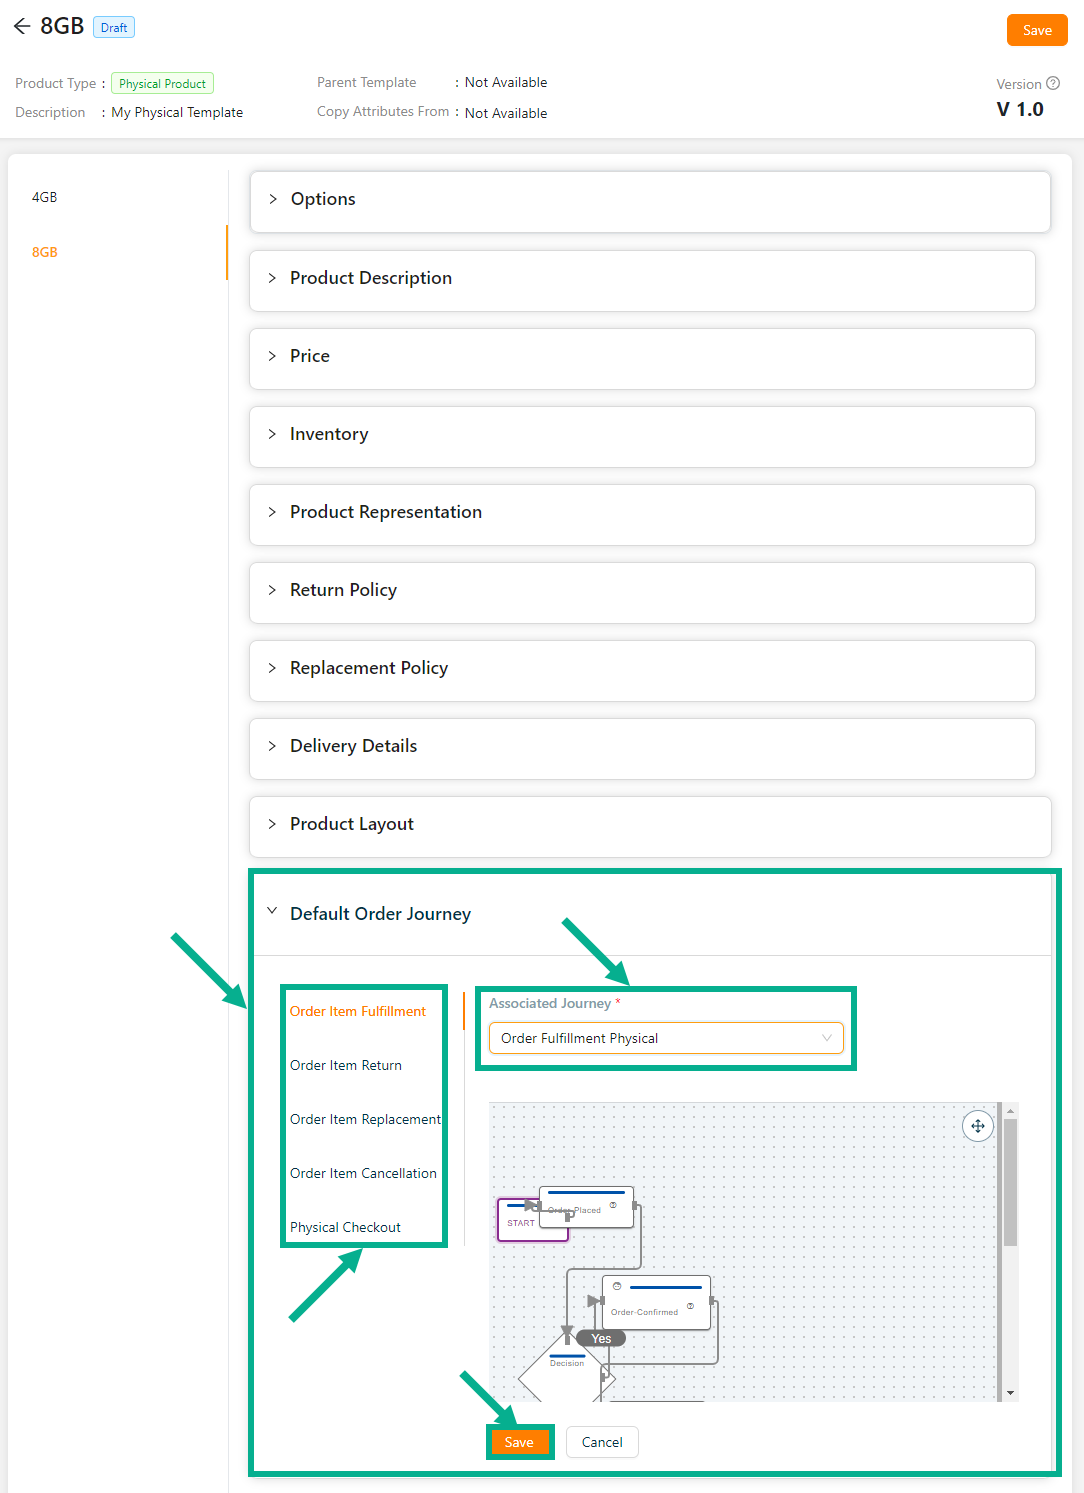
Click the Cancel button to discard the selected Event and Associated Journey.
- Click Update.
On updating, the confirmation message appears as shown below.

- Click Save.
On saving, the confirmation message appears as shown below.

- Select the remaining variant available.

Enter the mandatory values.
Click Save.
On saving, the confirmation message appears as shown below.
Click Submit For Approval button to submit the respective variant for approval.
The respective variant which is submitted for approval will be present in Awaiting for Approval tab of Vendor Portal.
Submitting For Approval
- Navigate to the Draft tab.
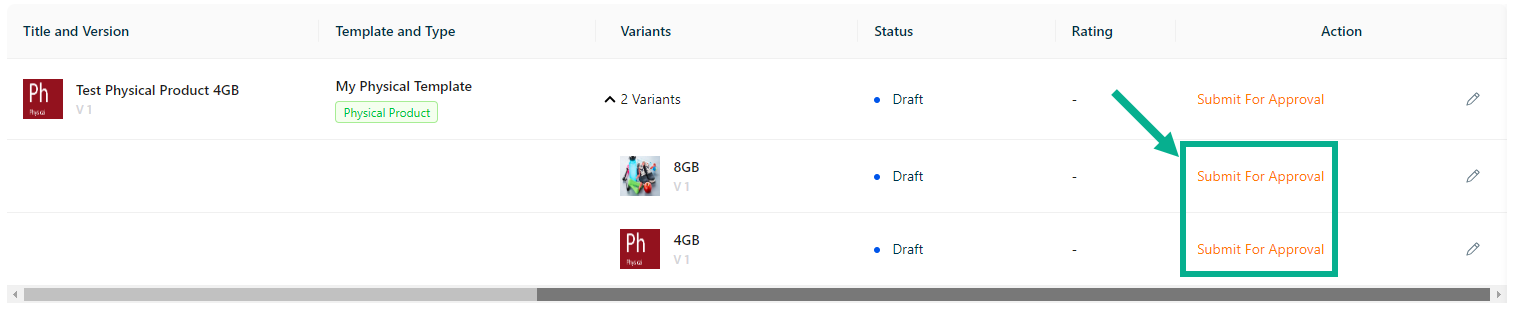
- Click Submit For Approval.
The Approval Request Submission dialogue box appears as shown below.
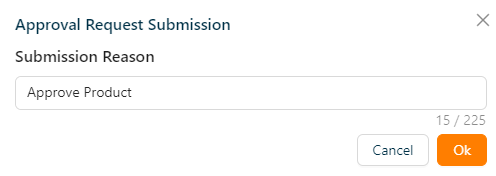
Enter Submission Reason.
Click Ok.
On submitting, the confirmation message appears as shown below.

The Product which is Submitted for Approval will be present in Awaiting Approval tab.
The Product which is Submitted for Approval is Approved or Rejected in the Store Management Portal.
Approved Product Templates will be present in Published tab.
Rejected Product Templates will be present in Rejected tab.
Unpublishing the Product
- Click Published tab.

- Click Make To Unpublished.
The Unpublish Request Submission dialogue box appears as shown below.
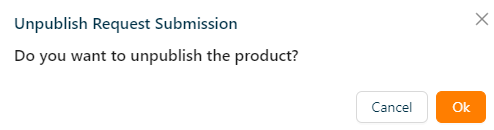
- Click Ok.
On unpublishing, the confirmation message appears as shown below.

Unpublished product is available in Unpublished tab.
Make It Draft
Products in Rejected Status can be moved to draft.
The Product which is Submitted for Approval is Rejected in Store Portal.
Rejected Product will be present in Rejected tab.
- Click Rejected tab.

- Click View Details.
The respective product details appear as shown below.
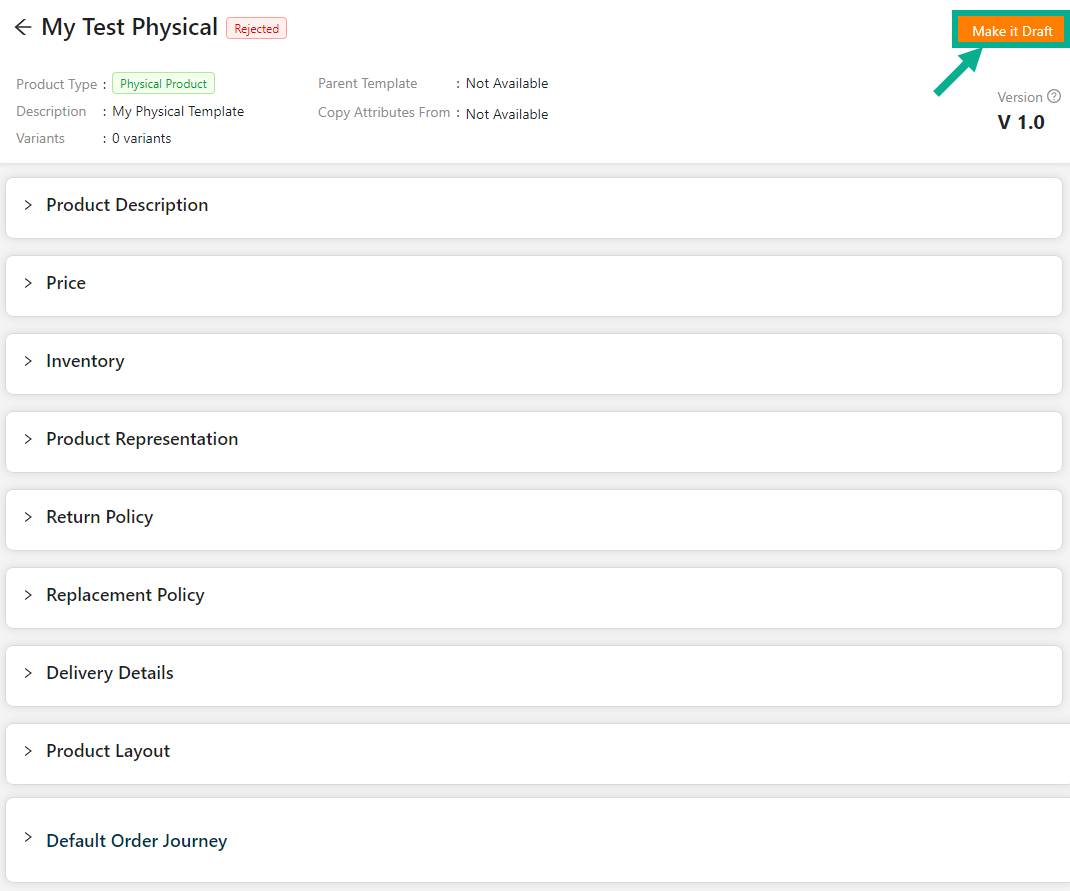
- Click Make it Draft.
The Request Submission Drafted dialogue box appears as shown below.
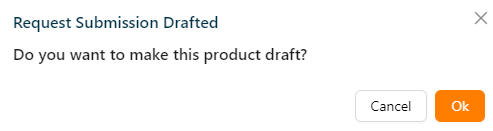
- Click Ok.
On drafting, the confirmation message appears as shown below.

The drafted product will be present in the Draft tab.
Retire a Product
This will be enabled once the product has been unpublished.
Retired product will be permanently removed across all portals.
- Click Unpublished tab.

- Click Retire.
The Retire Request Submission dialogue box appears as shown below.
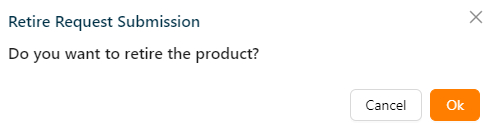
- Click Ok.
On retiring, the confirmation message appears as shown below.

Exporting the product templates and products
This will be enabled once any one of the product has been published.
- Click Export button.
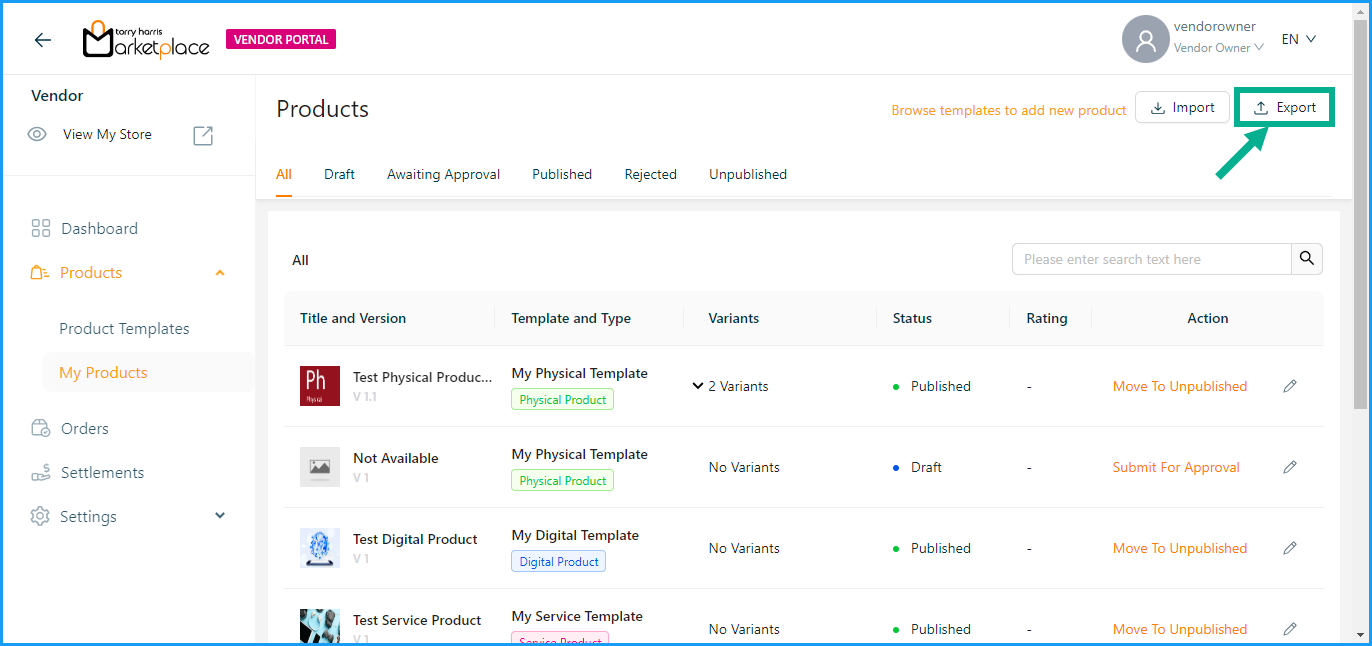
The Export Products dialogue box appears as shown below.
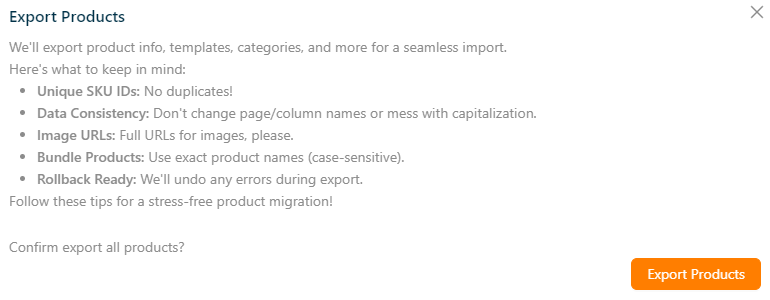
- Click Export Products button.
The published products and active product templates will download in Excel format to the local drive upon exporting.
Importing the product templates and products
- Click Import button
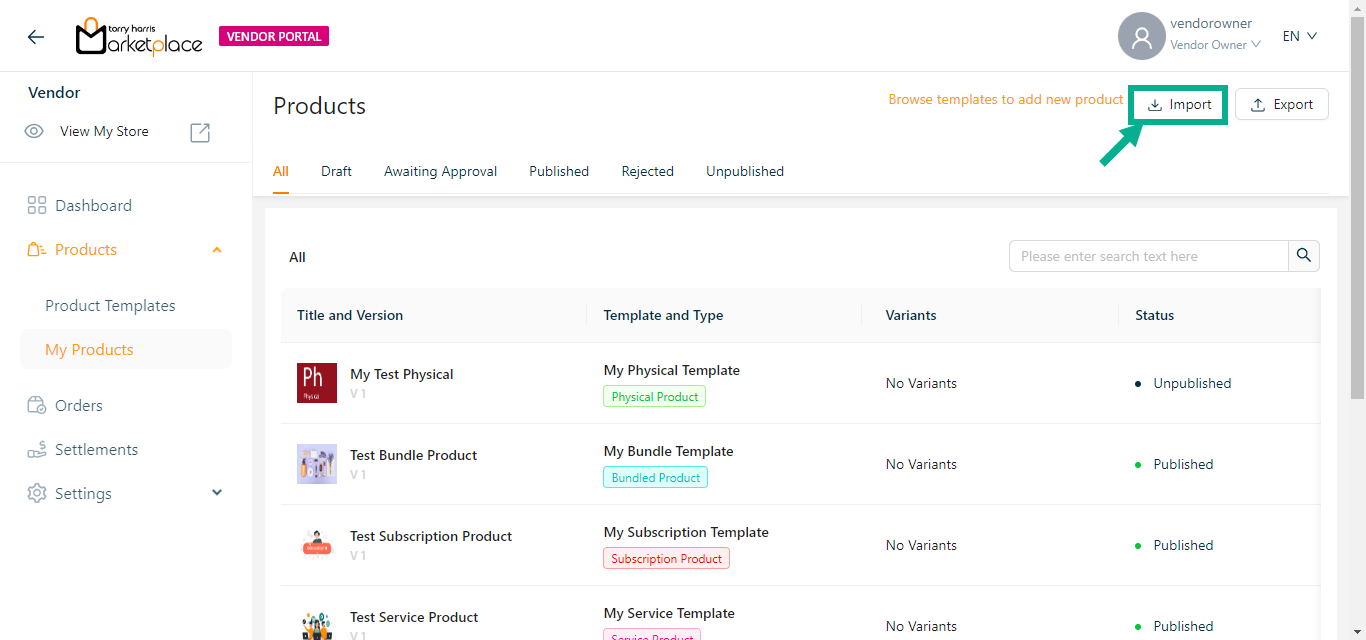
The Import Products dialogue box appears as shown below.

Click Download existing products as a Sample File button to export the active product templates and published products.
Import functionality supports only .xlsx file.
- To import the products and product templates, click or drag the file into the highlighted area.
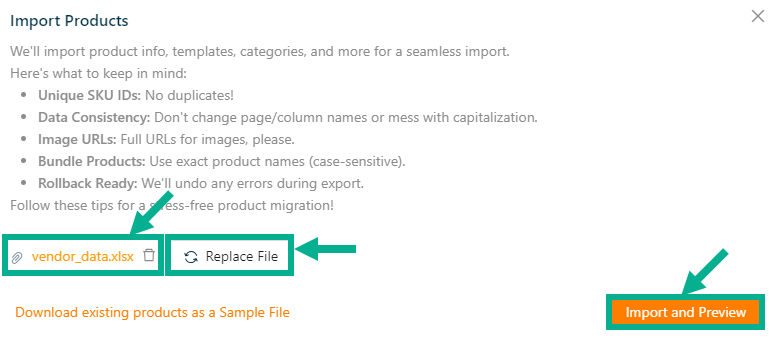
To remove the added file, select the Delete button.
To replace the file, click the Replace button.
- Click Import and Preview button.
On clicking, dialogue box appears as shown below.

- Click Confirm Import.
On importing, the confirmation message appears as shown below.

On successful import, the imported product templates will be available in the Active state and the imported products will be available in the Draft state.